SSO Configuration
As an admin, you can enable SSO login for your CloudAgent account. This allows your agents to log in using your organization’s identity provider (e.g., Okta). The process described below uses Okta as an example, but the steps are similar for other providers that support SAML 2.0.
Step 1: Configure Okta
-
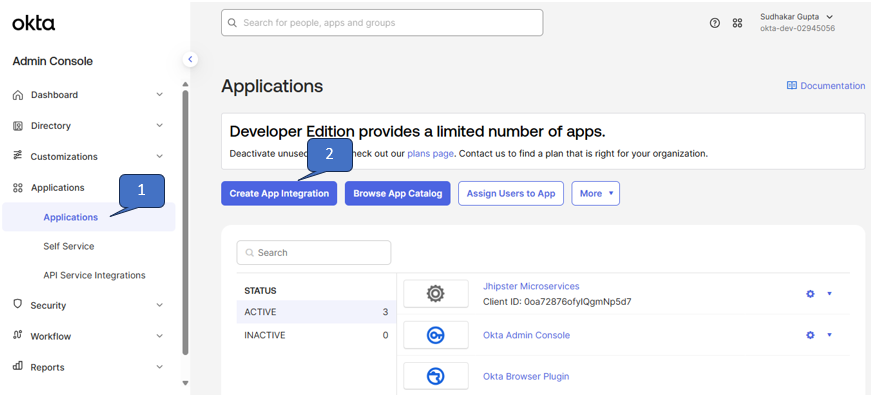
Log in to Okta and go to Applications.
-
Click Create App Integration → Select SAML 2.0. You’ll be redirected to the configuration page.
-
General Settings
- Provide an application name (any name you prefer).
- Configure other fields as required.
-
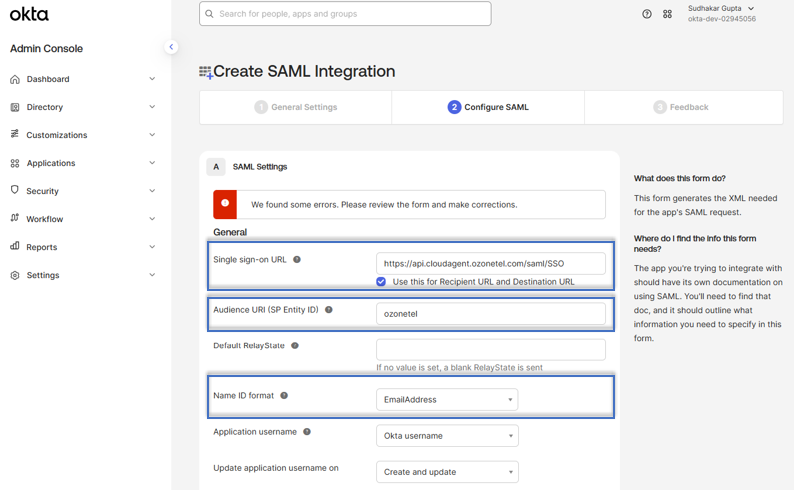
Configure SAML
-
Single Sign-On URL
- Domestic instance (India customers): https://api.cloudagent.ozonetel.com/saml/SSO
- US instance (outside India): https://api.cxhub.ozonetel.com/saml/SSO
-
Audience URI (SP Entity ID): ozonetel
-
Name ID format: EmailAddress
-
Other fields can be configured as required.
-
-
Feedback and Finish
- Fill out Okta’s optional feedback form.
- Click Finish. Your application will be created.
-
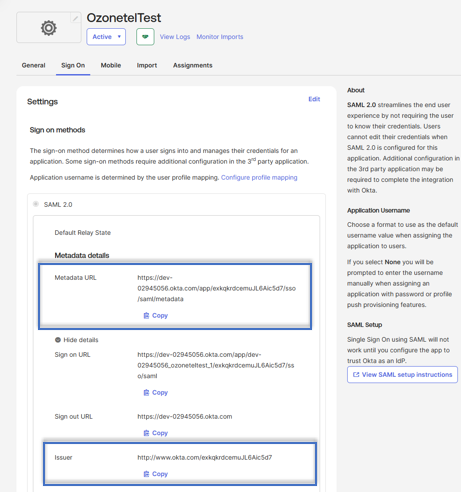
Collect Metadata from Okta
- Go to the app’s Sign-On tab. Copy the following:
-
Issuer URL
-
Metadata URL (or download the metadata XML file)
-
- Go to the app’s Sign-On tab. Copy the following:
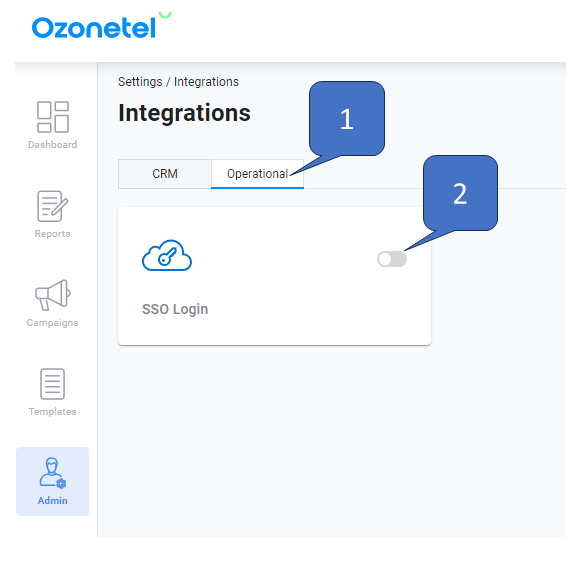
Step 2: Configure CloudAgent
-
Go to Admin -> Settings -> Integrations, and navigate to the Operational tab. Enable the SSO login option.
-
Fill out the configuration form:
-
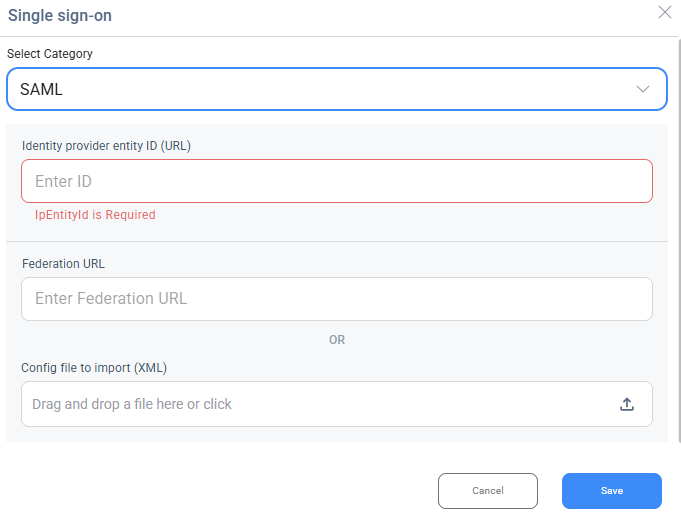
SAML configuration
-
Identity Provider Entity ID (URL): Paste the Issuer URL from Okta.
-
Federation Metadata: Provide the Metadata URL from Okta, or upload the downloaded metadata XML file.
-
-
-
If it's an LDAP configuration, provide the necessary detail to configure.

-
Save this configuration.
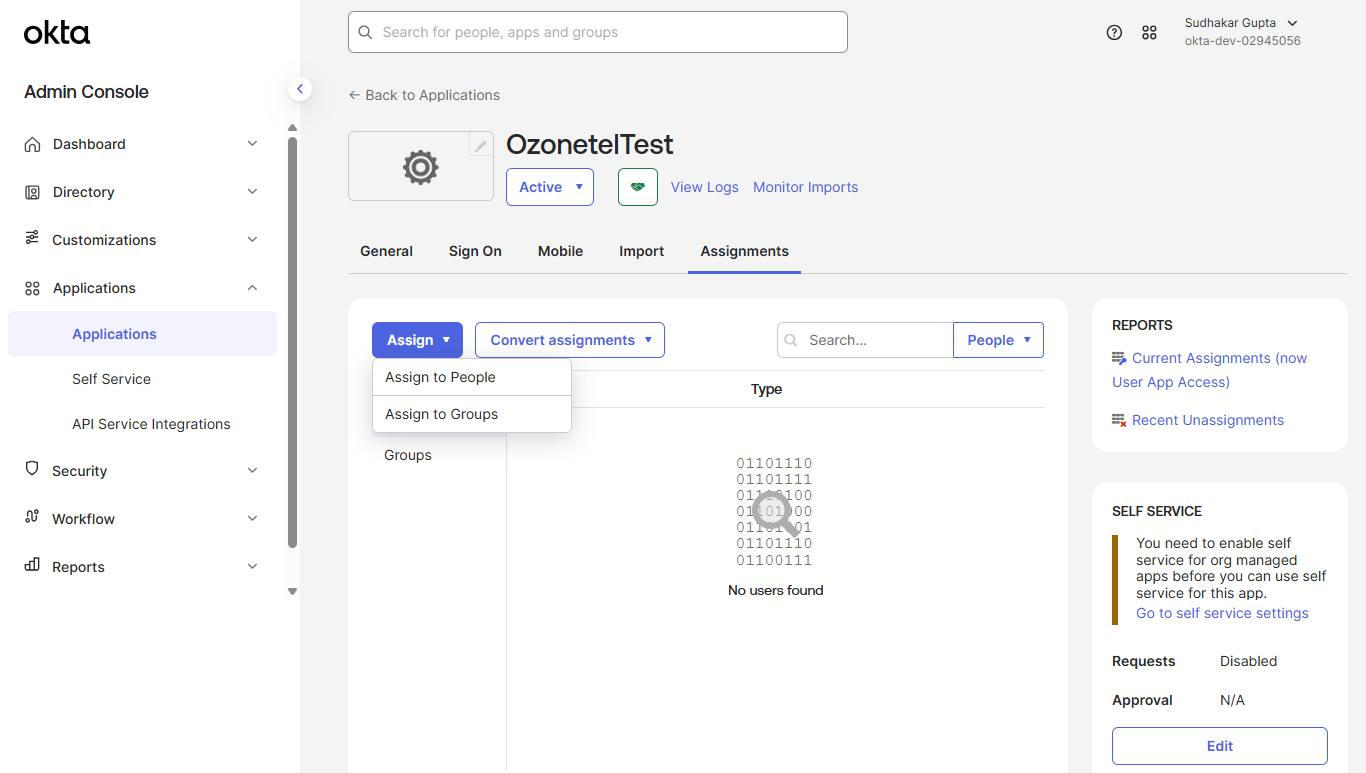
Step 3: Assign Users in Okta
- In your newly created Okta application, open the Assignments tab.
-
Assign individual users or groups to the application.
-
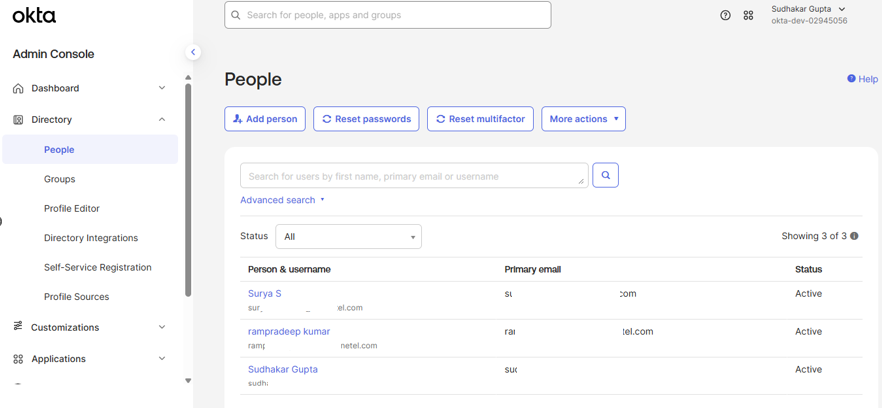
- To add new users in Okta:
-
Go to Directory → People and create users as required.
-
Important Notes
- Each agent or admin using SSO must have a valid email address configured in CloudAgent.
- Users must already be logged in your Okta system before they can log in to CloudAgent.
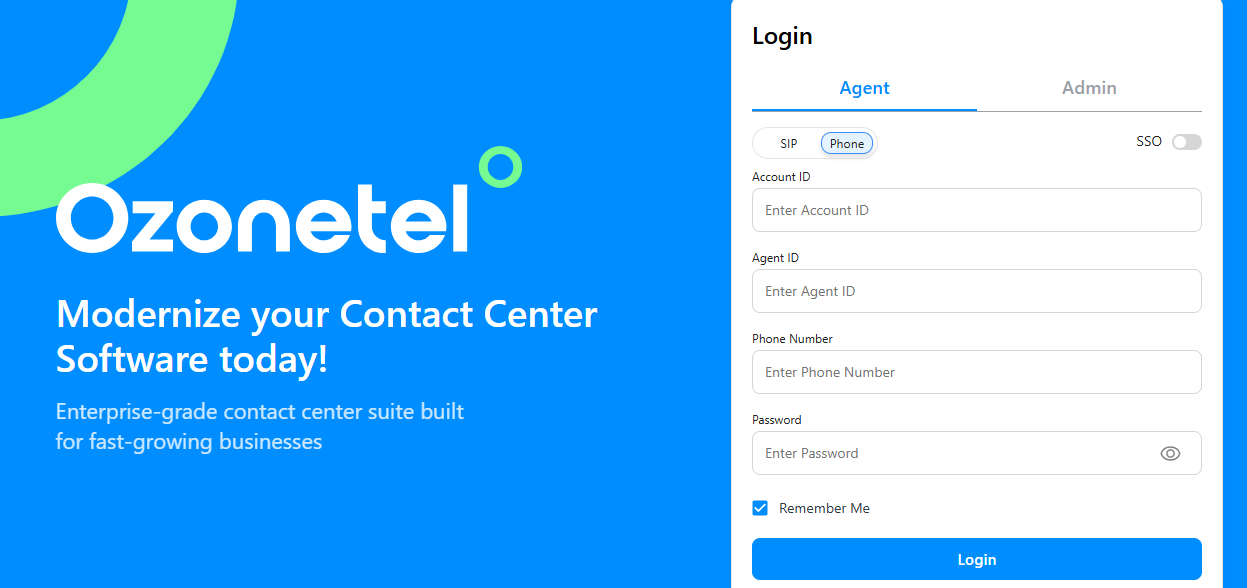
Final Outcome
Once the setup is complete, users will see the option to log in via SSO on the CloudAgent login page.
Updated 10 months ago