Integration with Salesforce
This support article provides a detailed guide on how to seamlessly integrate CloudAgent with Salesforce CRM.
Technical Prerequisites
- Salesforce Org
- Must be Lightning-enabled.
- Salesforce Permissions
- System Administrator profile required to install managed packages and configure CTI settings.
- Browser Support
- Preferably Chrome and Edge.
Core Features & Behaviors
| Feature | Description |
|---|---|
| Click to Call | Standard CTI Click-to-Call (C2C) – Agents can initiate outbound calls directly from Salesforce using the CloudAgent integration. |
| Screen Pop | When a new call connects to the agent, a screen pop is triggered based on the caller's number. The integration searches Salesforce using the number and returns results according to the softphone layout configuration. Search behavior: • Single result: Opens the matching Salesforce record. Custom business logic can be applied using Visualforce (VF) pages. • Multiple results: Opens Salesforce search results. VF pages can customize the logic. • No result: A new object creation screen can be configured. |
| Task Creation / Updation | After the screen pop, CloudAgent attempts to create a task associated with the matched object in Salesforce, as per portal settings. • If task creation fails due to mapping or response issues, it is retried during subsequent events (e.g., busy agent, call drop, disposition). • If no object is found by end of call journey, no task is created. • Once created, task fields are updated during follow-up events based on CloudAgent configurations. |
Installation of Cloud Agent App
- Log in to the Salesforce account.
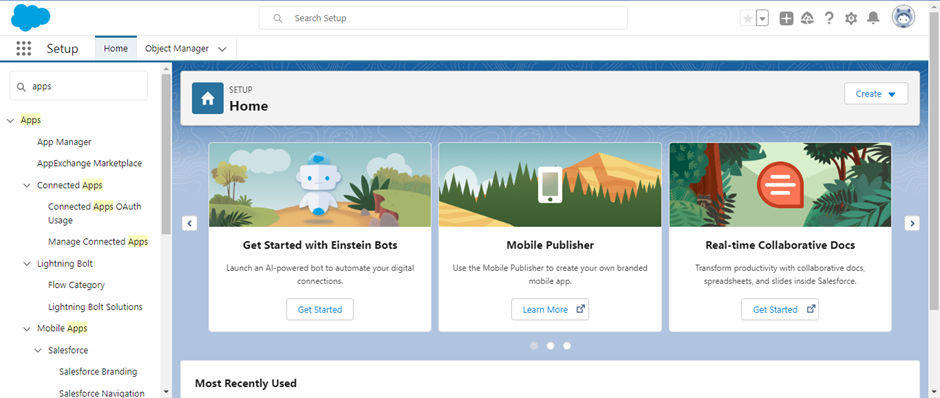
- Search for 'AppExchange Marketplace' in the search bar on the left-hand side of the home page as shown below.
- Search for Ozonetel in the new window
- Click on Ozonetel Omnichannel CTI/ Dialer/ IVR/ ACD/ Contact Center in the search results shown below.
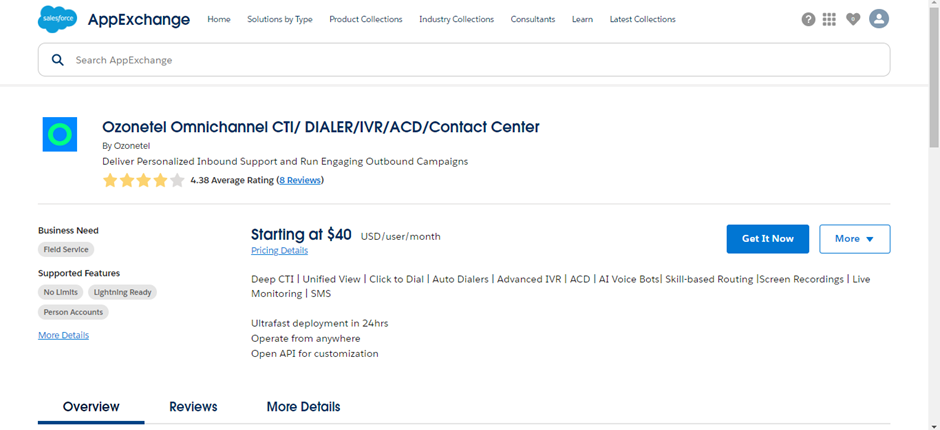
- Click on 'Get It Now' to install this package.
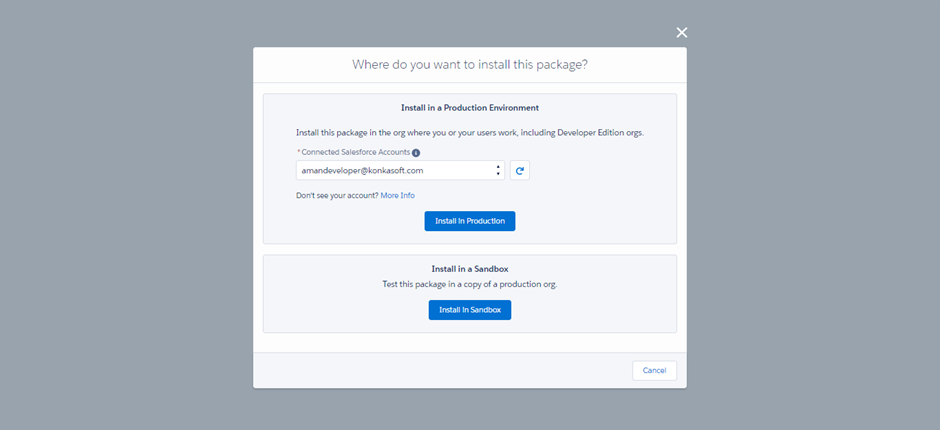
- Click on 'Install In Production' in the new popped-up window to install this package as shown below.
- Review and check the terms and conditions agreement. Click the "Confirm and Install" option to proceed.
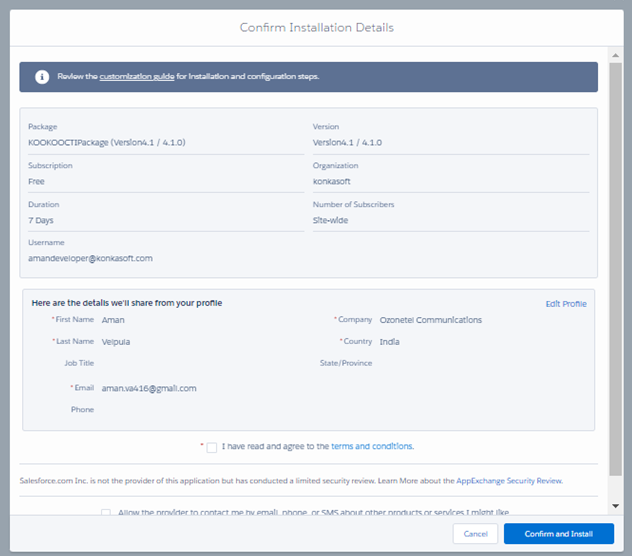
- The details in the above window can be updated using the 'Edit Profile' option and proceed with the installation.
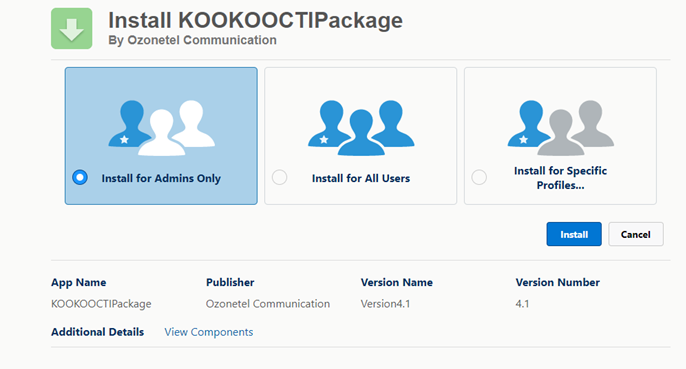
- Now select 'Install for All Users' and click Install.
- Click 'Done' post successful installation.
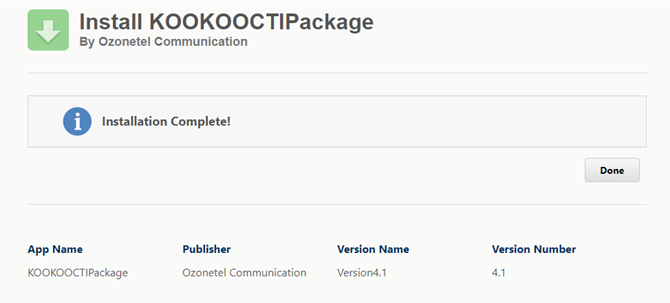
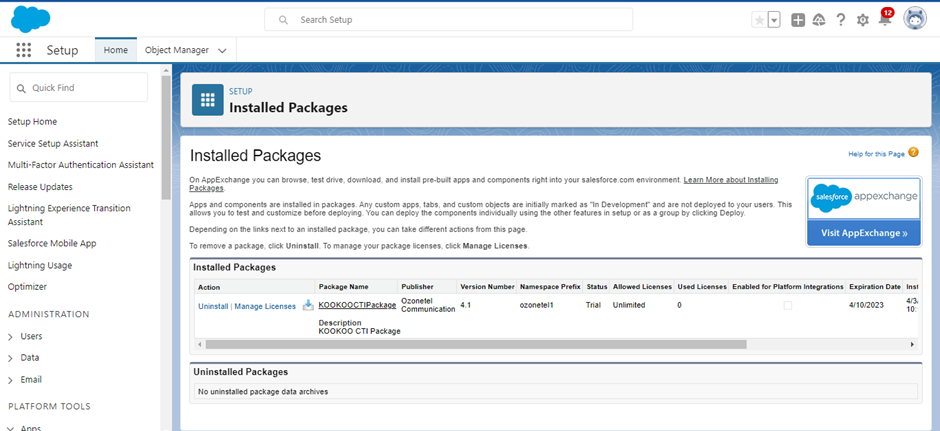
- As a next step, the installed package details will be shown for reference.
Assign the Salesforce user to the call center configuration.
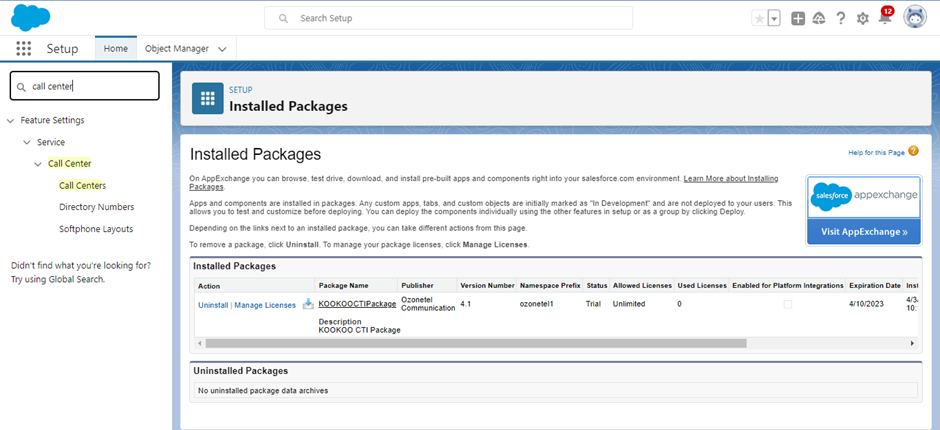
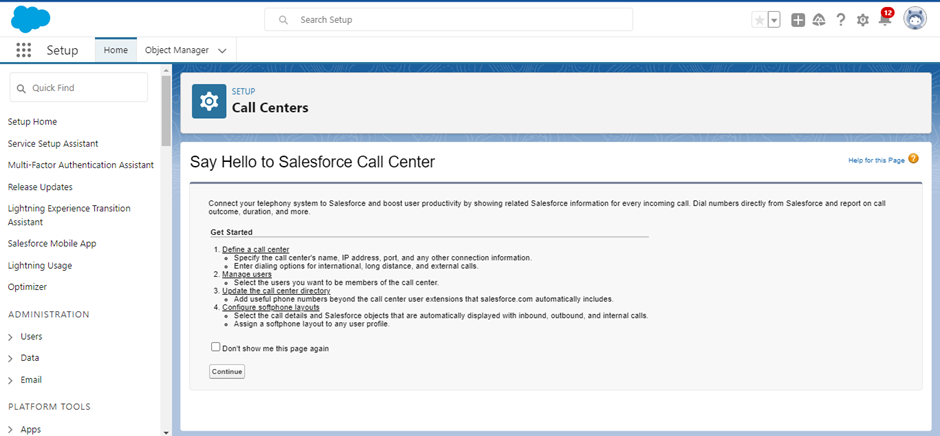
- Search for CallCenters and Click on 'Call Centers' as shown below.
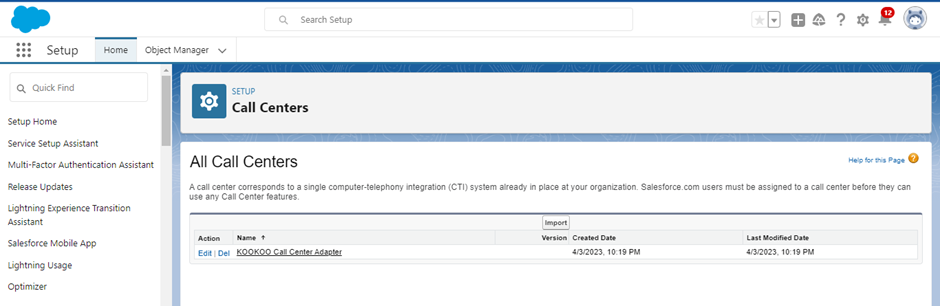
- On the Call Centers page click on 'Continue' to view the installed 'KOOKOO Call Center Adapter' as shown below.
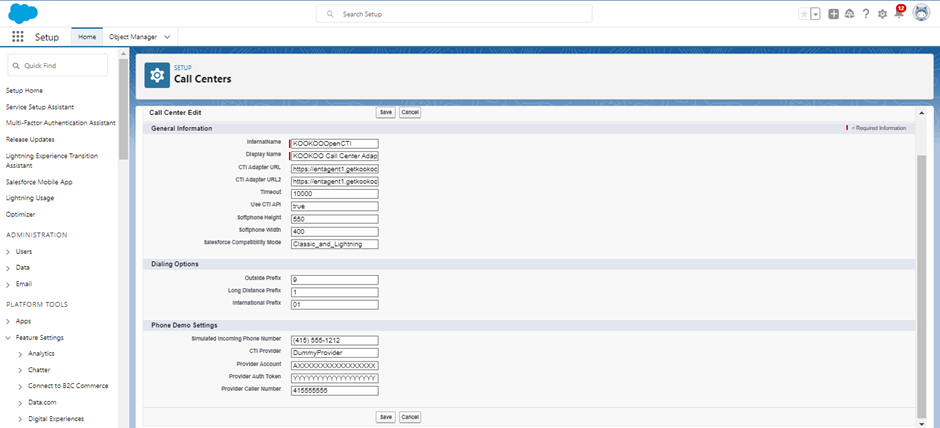
- Click on the Edit button beside the KOOKOO Call Center Adapter to change the URL.
- On the edit page, utilize the 'CTI Adapter URL' and 'CTI Adapter URL2' fields to update the URL.
-
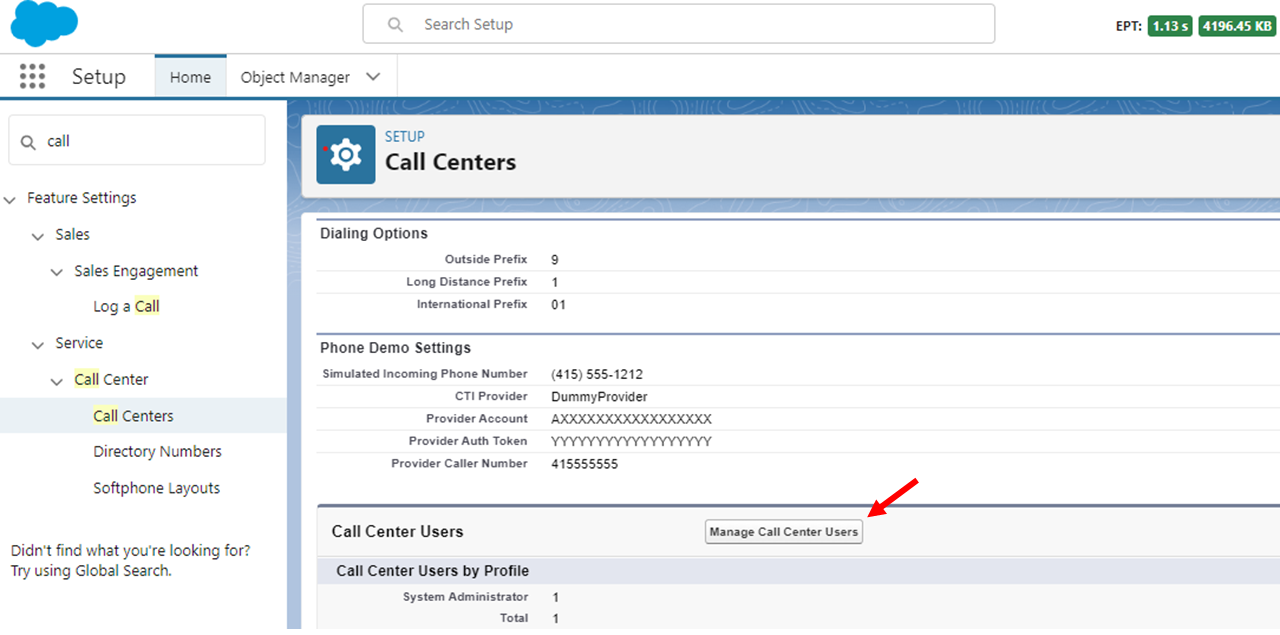
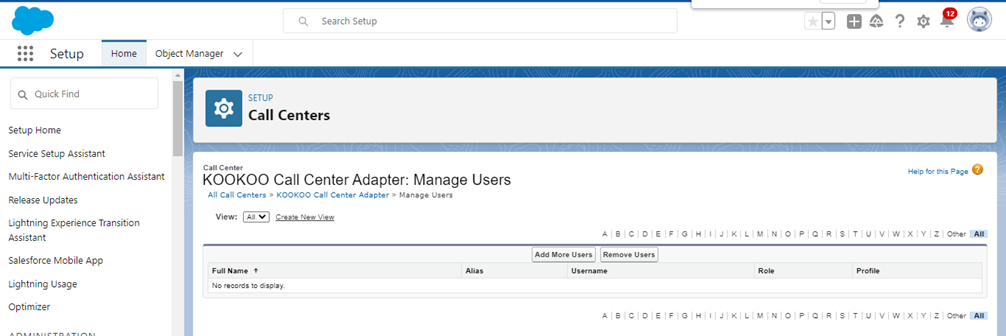
Once this is saved, click the Manage Call Centers Users button to add users.
-
If no users are found as shown below, click on Add More Users.
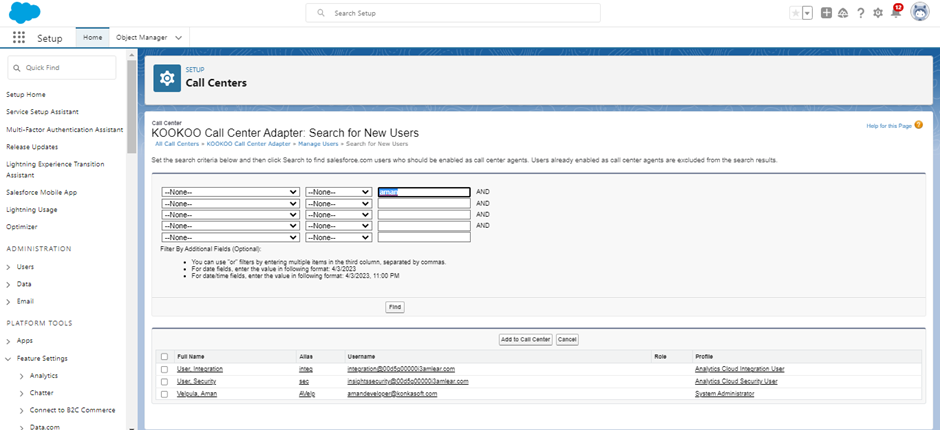
- Type in the name of the user in the organization and click on the search button.
- Select the appropriate username from the search results.
- Click on 'Add to Call Center' to add that particular user.
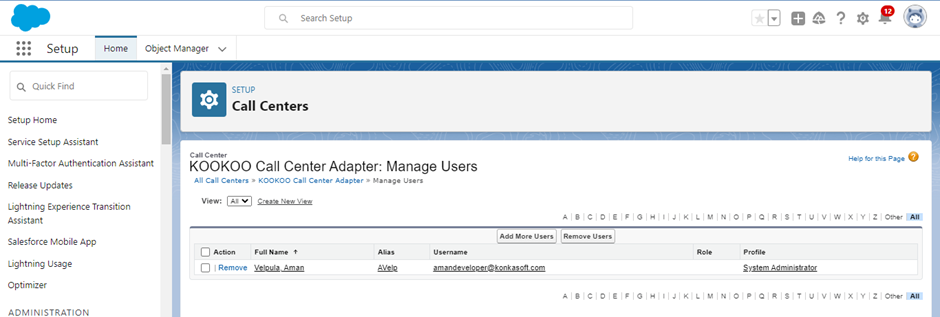
- The users on the Manage Users page will be able to view the CloudAgent widget.
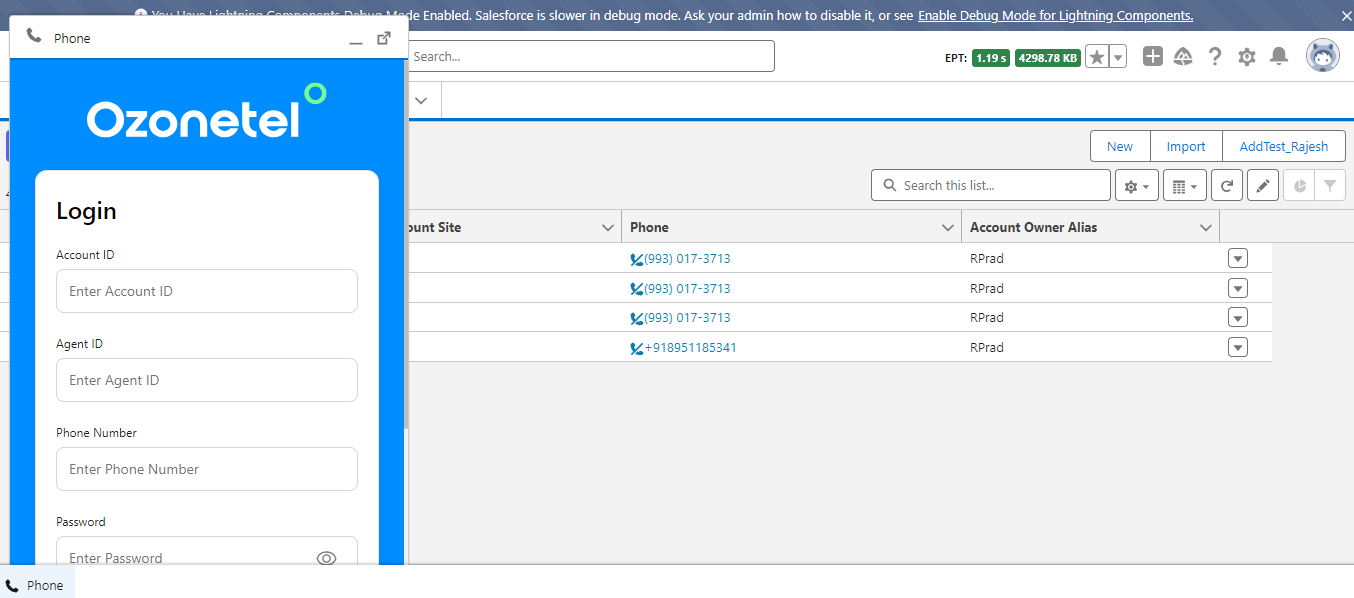
- Post successful installation the CloudAgent app will be visible on the bottom left corner of the CRM as shown below.
Configure Softphone Layout
- Search for 'Softphone Layouts' in the search results.
- Click 'New' to add a new Softphone as shown below.

- Input the desired username
- Customize the Softphone Layouts based on your choice using the 'Edit' button.
- Save the CloudAgent app once the changes are completed.
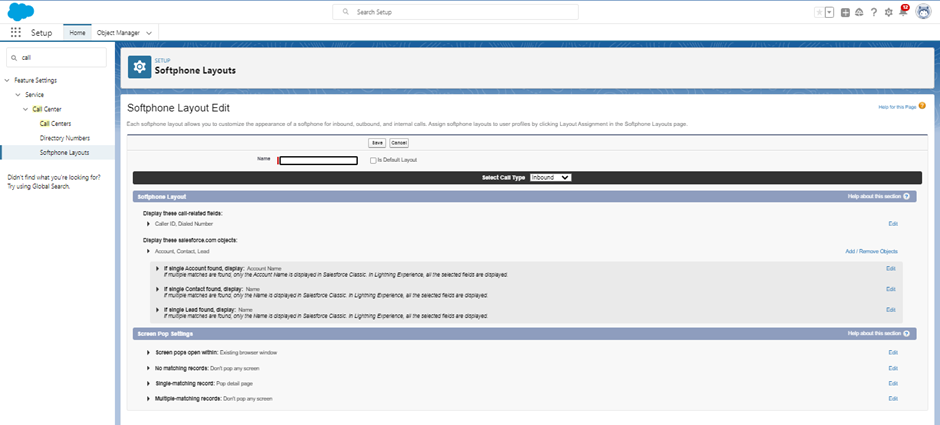
Screen Pop-Up Settings
Screen Pop-up settings can be customized as per requirement in the screen pop settings tab as shown below.
For example:
- No matching records settings
- By default, if no matching records are found in the leads it is set to Don’t pop any screen, but the requirement is, that the screen should pop up if the Leads have no matching records
- Click on the edit option on the right side of no-matching records and check Pop to new,
- Select Leads in the drop-down menu and click Save.
This will make the screen pop up, whenever there is no matching lead
Chat Integration with Salesforce
To integrate chat functionality with Salesforce, you'll need to create a custom object, add the necessary fields, and configure the integration settings. Follow these steps to complete the integration:
-
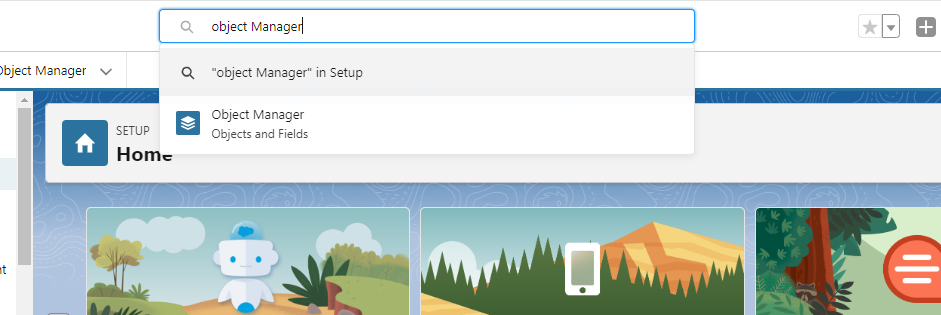
Access Object Manager:
-
Log in to your Salesforce account.
-
In the setup menu, search for and select "Object Manager."
-
-
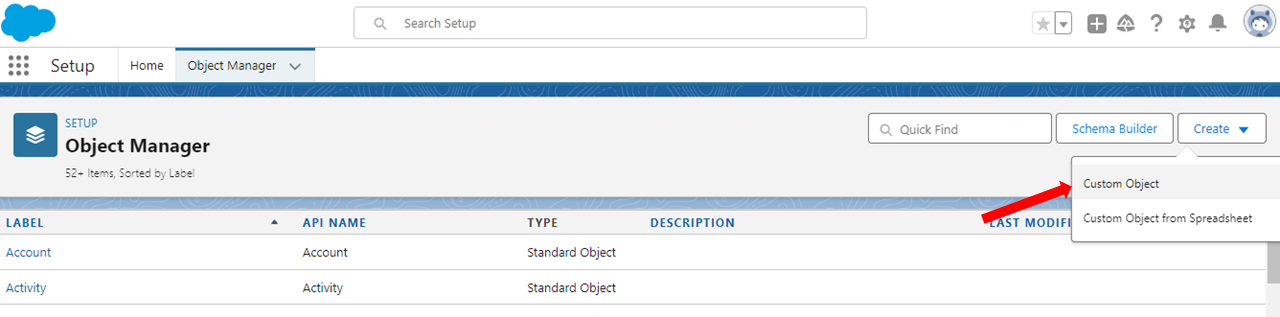
Create a Custom Object:
-
Click on the "Create" button and select "Custom Object."
-
Fill in the required information for your new object, such as Label, Plural Label, and Object Name.
-
Save the custom object.
-
-
Add Fields to the Custom Object:
-
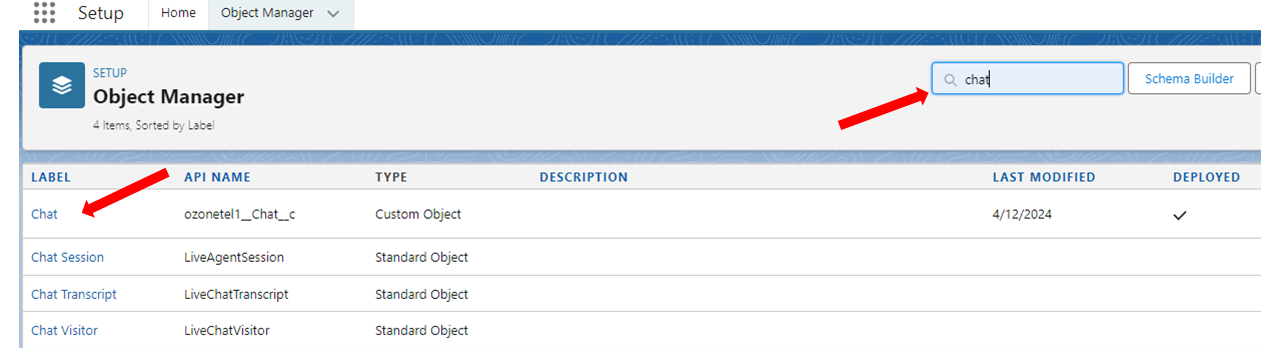
Return to the Object Manager screen.
-
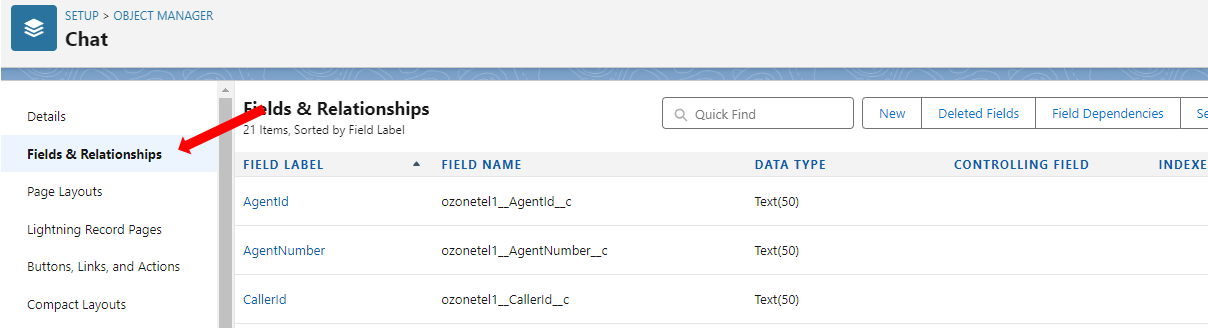
Locate and select the custom object you just created. For example, in the below image, I have created an object named chat.
-
Click on the "Fields & Relationships" tab.
-
-
Create a New Field:
-
Click the "New" button to add a new field

Step 1: Choose Field Type
- Select the field type. For flexibility, choose "Text," which allows users to enter any combination of letters and numbers.
Note:
While mapping the"Transcript" field, data type must be rich text area
Step 2: Enter Field Details
- Enter the necessary details for the field, such as Field Label, Field Name, and Length for the text field.
Step 3: Establish Field-Level Security
- Set the field-level security by selecting the profiles that should have edit or read-only access to this field.
Step 4: Add to Page Layout
- Add the new field to the relevant page layout to ensure it appears where needed.
- Select the field type. For flexibility, choose "Text," which allows users to enter any combination of letters and numbers.
-
Repeat these steps as necessary to add all required fields to your custom object.- Add Lookup Field to Activity Object:
- In the Object Manager screen, select the object named 'Activity' and access the Fields & Relationships section.
- Create a New Custom Field.
- Step 1: Choose the Field Type
- Choose the option: Lookup Relationship
- Step 2: Choose the related object
- In the Related To drop-down, select the custom object you created earlier in Point No. 2.
- Step 3: Enter the label and name for the lookup field.
- Fill out the necessary fields and proceed to the next step.
- Step 4: Establish field-level security for reference field
- Set the field-level security by selecting the profiles that should have edit or read-only access to this field.
- Step 5: Add the reference field to Page Layouts
- Select the page layouts that should include this field.
- Step 6: Add custom related lists
- Specify the title that the related list will have in all of the layouts associated with the parent.
- Also, select the page layouts that should include this field.
- Step 1: Choose the Field Type
- Integrate with CloudAgent:
- Log in to your CloudAgent account.
- Navigate to Admin -> Settings -> Admin Settings -> Integration.
- Search for the setting named "Salesforce Chat Entity Name" and add the API name that you provided to the custom object created in step 2.
- Similarly, search for the setting "Salesforce Chat Relation Field in Task" and add the Field Name that you provided for the Activity Object in step 5.
- Map all the fields created on the custom object to the corresponding fields in the CloudAgent settings page.
Set Up Single Sign-On (SSO) for Salesforce Integration
CloudAgent supports single sign-on (SSO) with Salesforce, allowing agents to be automatically logged in to the CloudAgent toolbar when they sign in to Salesforce. This eliminates the need for a separate toolbar login and ensures a seamless agent experience.
Here is how you can set up:
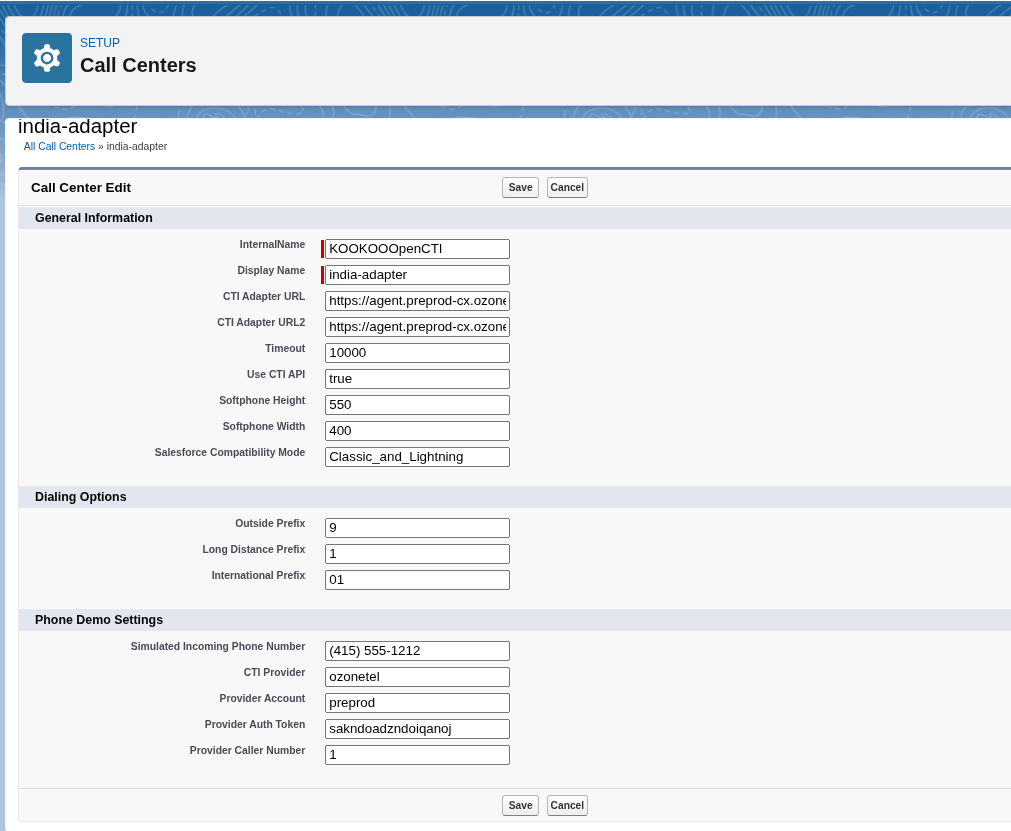
Salesforce Call Center Configuration
From the Salesforce Admin account, update the following fields in the Call Center settings:
| Field Name | Description |
|---|---|
| Provider Account | CloudAgent Account Name used for agent login |
| Provider Auth Token | CloudAgent account API Key (available in the CloudAgent Admin Settings) |
| Provider Call Number | Set this value to 1 to enable SSO login. Any other value disables SSO. |
Important: SSO login is triggered only when Provider Call Number = 1.
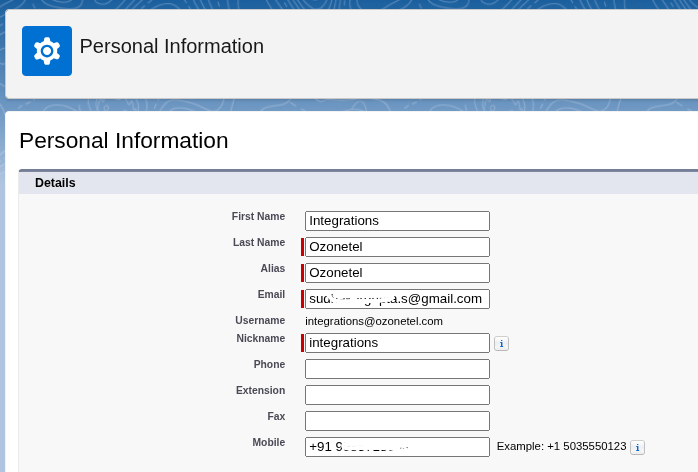
Agent Mapping Requirement
For SSO to work correctly:
- The Agent ID in CloudAgent must exactly match the Salesforce Username
- Salesforce Username can be found in the user’s Profile Information
This mapping ensures the correct agent is identified during login.
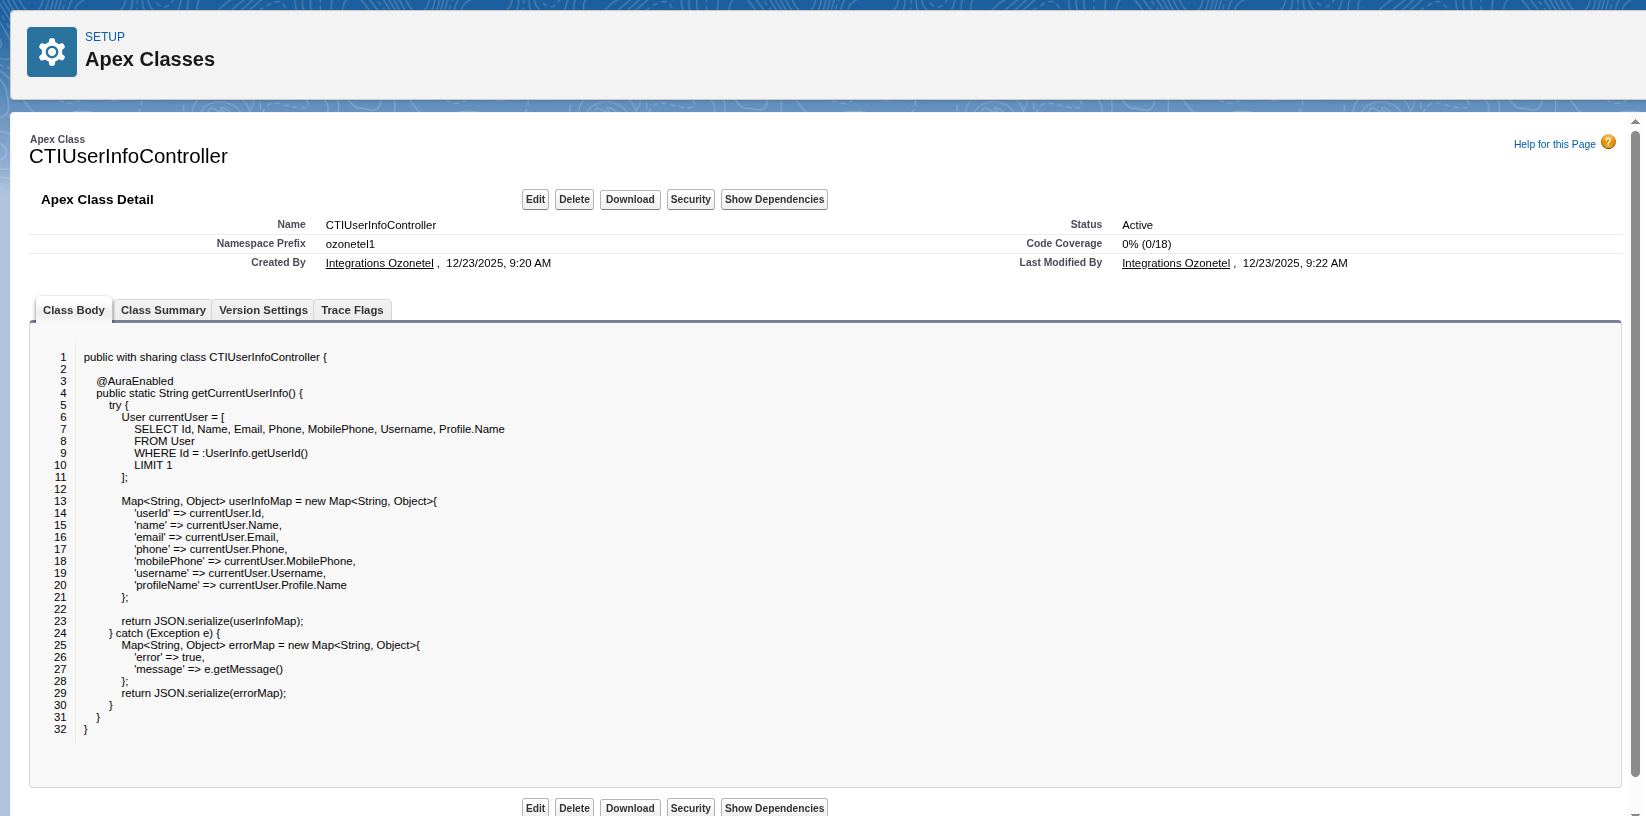
Apex Class Requirement
Salesforce requires a custom Apex class to pass authenticated user details to the CloudAgent toolbar.
Steps to Create the Apex Class
- Log in to Salesforce as an Admin
- Go to Setup
- Navigate to Custom Code → Apex Classes
- Click New
- Paste this Apex code
public with sharing class CTIUserInfoController { @AuraEnabled public static String getCurrentUserInfo() { try { User currentUser = [ SELECT Id, Name, Email, Phone, MobilePhone, Username, Profile.Name FROM User WHERE Id = :UserInfo.getUserId() LIMIT 1 ]; Map<String, Object> userInfoMap = new Map<String, Object>{ 'userId' => currentUser.Id, 'name' => currentUser.Name, 'email' => currentUser.Email, 'phone' => currentUser.Phone, 'mobilePhone' => currentUser.MobilePhone, 'username' => currentUser.Username, 'profileName' => currentUser.Profile.Name }; return JSON.serialize(userInfoMap); } catch (Exception e) { Map<String, Object> errorMap = new Map<String, Object>{ 'error' => true, 'message' => e.getMessage() }; return JSON.serialize(errorMap); } } } - Save the class
Once saved, Salesforce can securely send user context to CloudAgent during login.
Final Activation Checklist
After completing the above steps:
- Ensure Call Center settings are saved
- Verify Provider Call Number = 1
- Confirm agent usernames are correctly mapped
SSO will now work automatically when agents log in to Salesforce.
Important Notes
- Phone-number-based login with SSO is not supported at this time
- If the configuration is incomplete or mismatched, the agent may not be logged in automatically
Updated 6 months ago