User Profile
Introduction
CloudAgent offers potent user management features, including the creation of Sub-Admins and control over their access permissions. Admins can create new users and assign them specific access rights to CloudAgent functionalities, ensuring that only authorized personnel can perform certain tasks within the contact center environment.
Creating a user profile
To create a Sub-Admin or sub-user, you first need to set up a User Profile. Follow these steps to create one:
-
Navigate to: Admin -> People -> User Profile
-
Add a New Profile: Click on "Add Profile" to start creating a new user profile.
-
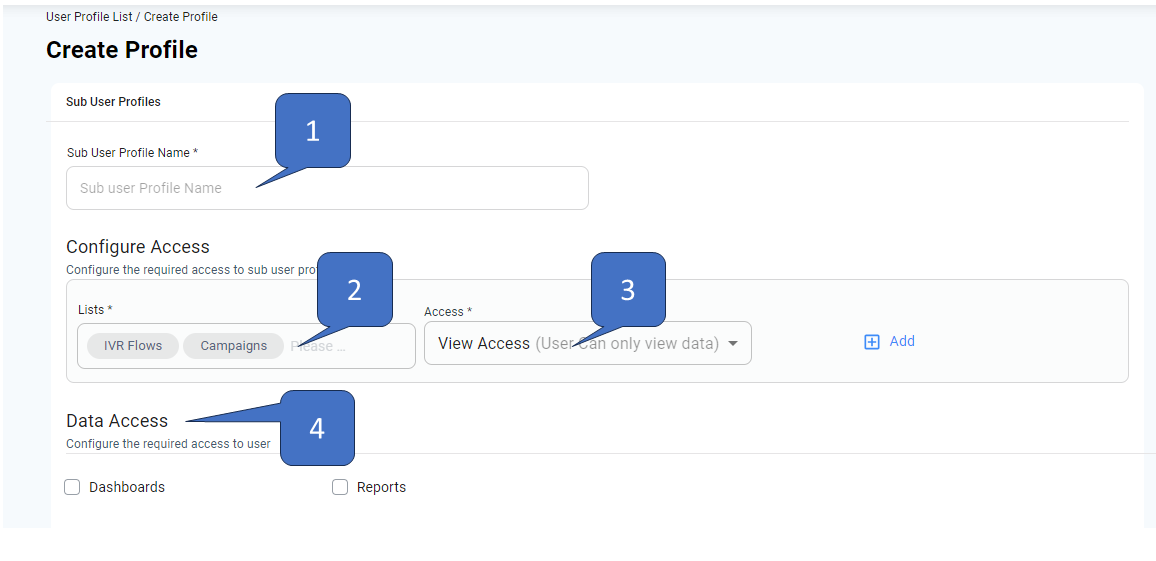
Complete the User Profile Form:
-
Profile Name: Assign a name to the sub-user profile.
-
Configure Access: Select the required modules and specify the access levels for the sub-user. Modules might include Agents, Skills, IVR Flows, etc. Access levels are:
- View Access (gives read-only access to all system aspects)
- Edit Access (gives edit (but no-delete) access to all system aspects)
- Full Access (gives full access to all system aspects)
- Data Upload Access (gives access to upload data into a campaign only*)
-
Data Access: Choose whether the sub-user can access Dashboards, Reports, or both, depending on your preferences.
-
-
Save the Profile: After filling in all the necessary fields and configuring access, save the profile.
This process will create a user profile that can be assigned to sub-users, giving them the appropriate permissions and access within CloudAgent. To create a Sub-user, refer here
Updated about 1 year ago