Integration with Zendesk
Enable seamless telephony within Zendesk Support with embedded click-to-call, instant screen-pop, and automated ticket logging.
Technical Prerequisites
- Zendesk Account
- Admin rights to install private apps.
- Browser Support
- Preferably Chrome and Edge.
- Permissions Needed
- Zendesk Admin role to install the CloudAgent app and grant necessary scopes.
Core Features & Behaviors
| Feature | Description |
|---|---|
| Click to Call | Standard CTI Click-to-Call (C2C) – Agents can initiate outbound calls directly from the Zendesk interface using the integrated click-to-call option. |
| Screen Pop | When a call connects to the agent, CloudAgent searches Zendesk using the customer’s phone number. • If a match is found, a ticket is created and opened. • The search logic and screen pop behavior are managed by the integrated CTI layout and app settings. |
| Ticket Creation/Update | A new ticket is created when the call connects, based on configurations in the CloudAgent portal and the Zendesk app settings. • If ticket creation fails (e.g., due to field mismatches or request/response issues), CloudAgent will retry at later events such as agent busy, call drop, or disposition. • Once created, ticket fields are updated dynamically during subsequent call events, as per the configured settings. |
Installation of Cloud Agent app
- Login to the Zendesk account.
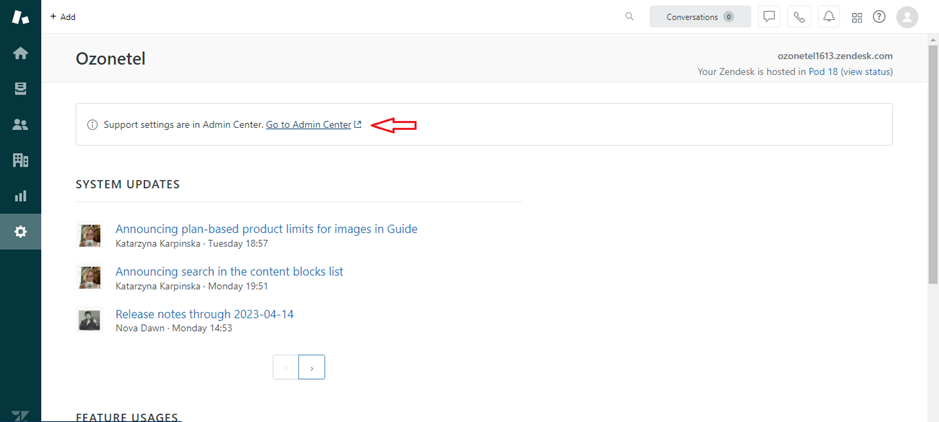
- Click on 'Settings' icon in the left navigation as shown below
- Click 'Go to Admin Center' in the settings page
-
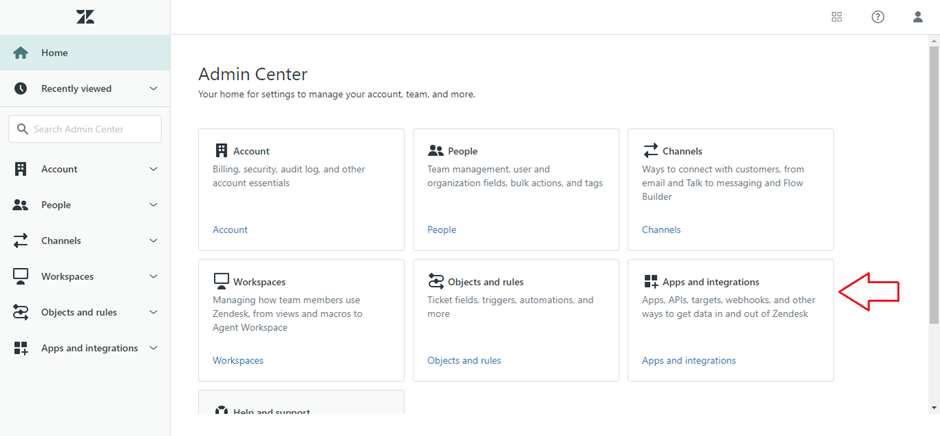
Select 'Apps and Integrations' in the Admin Center page
-
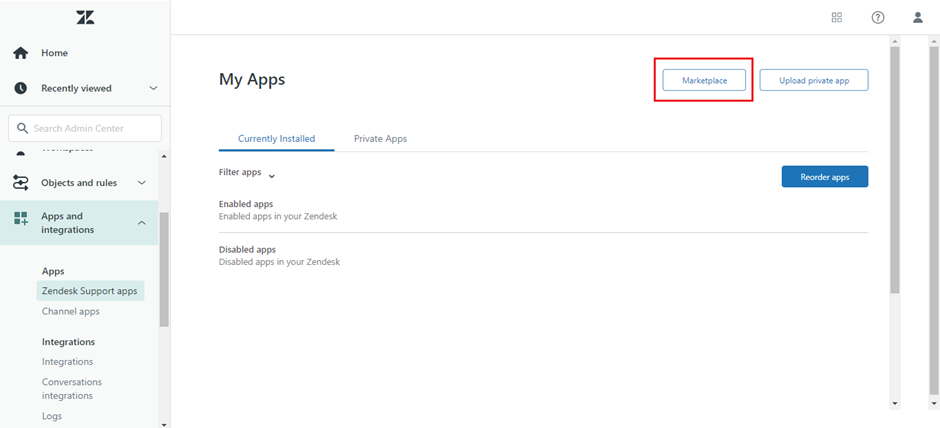
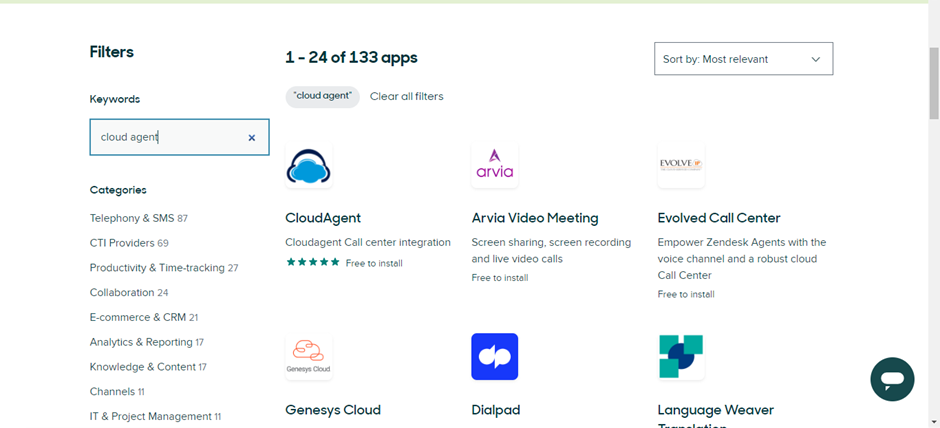
Click on 'Marketplace' in the My Apps page as shown below
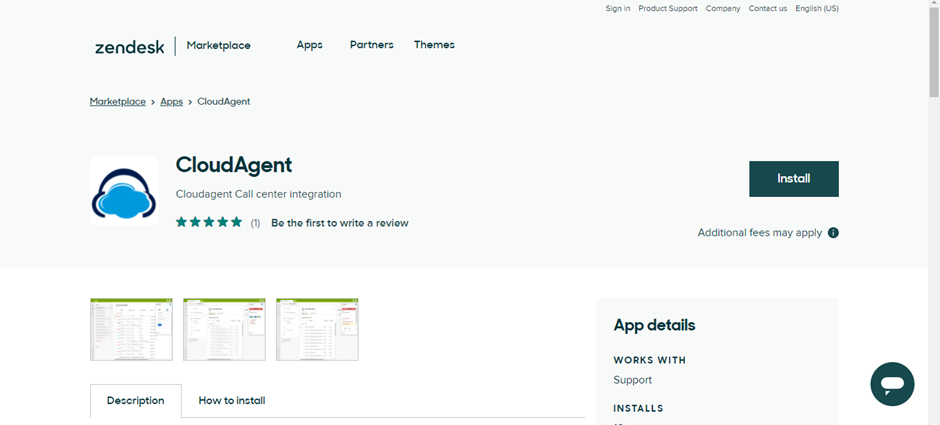
- Search for 'CloudAgent' in the marketplace and select the 'Cloudagent Call Center Integration' app
-
Install the 'CloudAgent' app
-
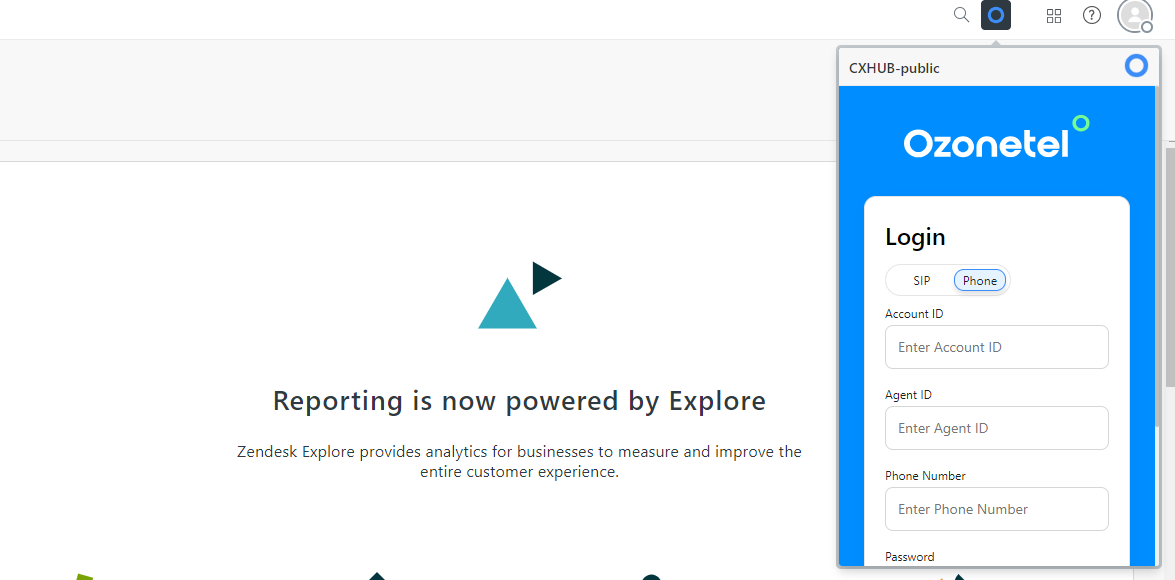
Post successful installation, the CloudAgent app will be visible on the top menu of the Agent workspace screen as shown below.
-
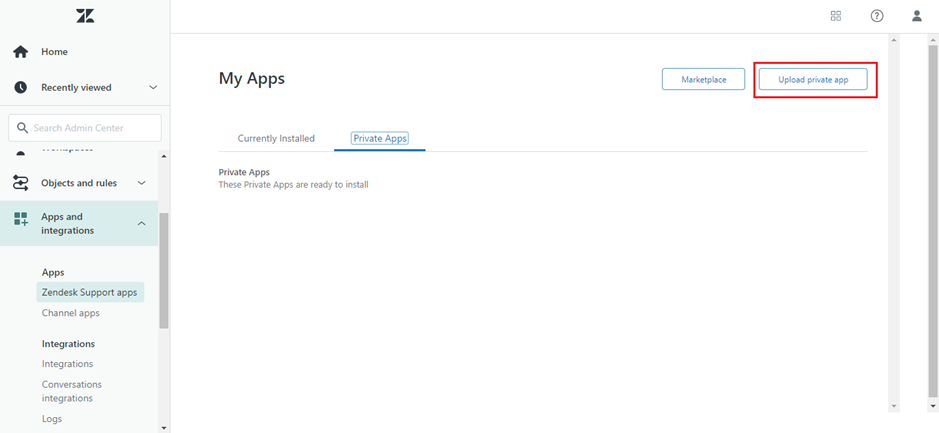
To customise the 'CloudAgent' app, click on the 'Private Apps' tab under 'My Apps'
-
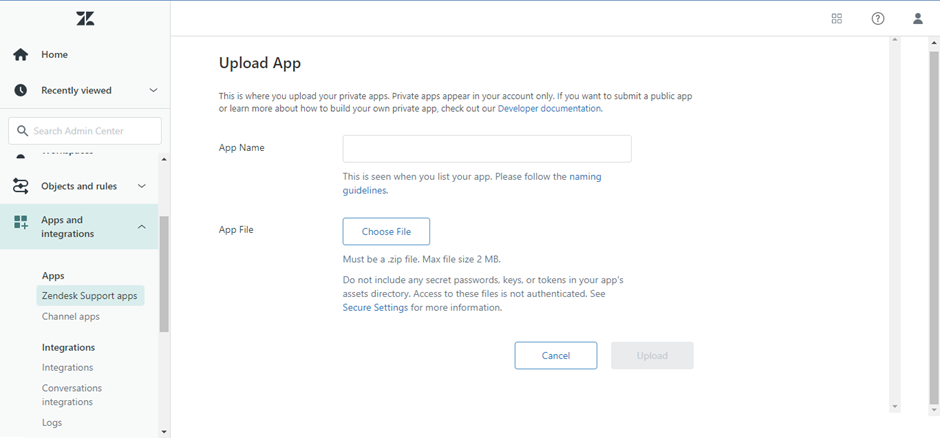
Select 'Upload Private App'
-
Provide a name for the app
-
Upload the zip file provided by Ozonetel and select 'Upload'
-
-
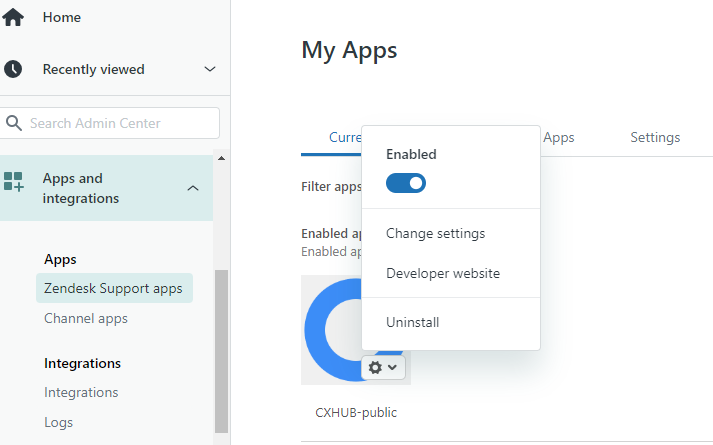
You can modify the configuration settings by navigating to "Apps and Integrations -> Zendesk Support Apps." Here, you'll find the list of currently installed apps. Click on the settings icon and then select the "Change Settings" button to make your adjustments.
-
On the change settings page, you can adjust various settings and click the "Update" button to save your changes. Key settings available on this page include:
- CA - Allow agent location: This option lets agents select their CloudAgent location before logging in.
- Toolbar URL: Customize the toolbar URL based on your location and requirements.
- Click2Call: Enable or disable the Click2Call feature as needed.
- Ticket creation: Configure ticket creation for Inbound, Manual, Preview, Progressive, and Predictive calls.
- Customize the ticket subject to your preference.
- Toolbar Size: Adjust the height and width of the toolbar to fit your needs.
Updated about 1 year ago