Microsoft Dynamic 365
This guide provides a complete reference for integrating Ozonetel's CloudAgent with Microsoft Dynamics 365, covering both Version 1.0 and Version 2.0 integration methods.
It includes prerequisites, supported features, and step-by-step implementation instructions for each version.
Technical Prerequisites
| Requirement | Details |
|---|---|
| Supported Dynamics Versions | Version 1.0 and Version 2.0 (choose the method matching your Dynamics setup) |
| Browser Compatibility | Google Chrome or Microsoft Edge (latest versions recommended) |
Core Features & Behaviors
| Feature | Description |
|---|---|
| Click to Call | Standard CTI Click-to-Call (C2C) |
| Screen Pop | On incoming calls, CloudAgent searches MS Dynamics 365 using the caller’s phone number. • If a matching record is found, the corresponding contact or lead is automatically opened for the agent. • This provides immediate context for effective customer handling. |
| Call Creation/Updation | • When a call is connected, CloudAgent creates a call log in MS Dynamics based on the integration settings. • If the log creation fails (due to API response or mapping issues), CloudAgent retries on later events such as call drop, busy agent, or disposition. • Once the call log is created, the associated fields are updated automatically during subsequent call events as configured in the CloudAgent portal. |
Implementation Overview
Integration steps vary depending on whether you are using Version 1.0 or Version 2.0 of Dynamics 365.
Version 1.0 — Using Channel Integration Framework App
-
Sign in to Dynamics 365.
-
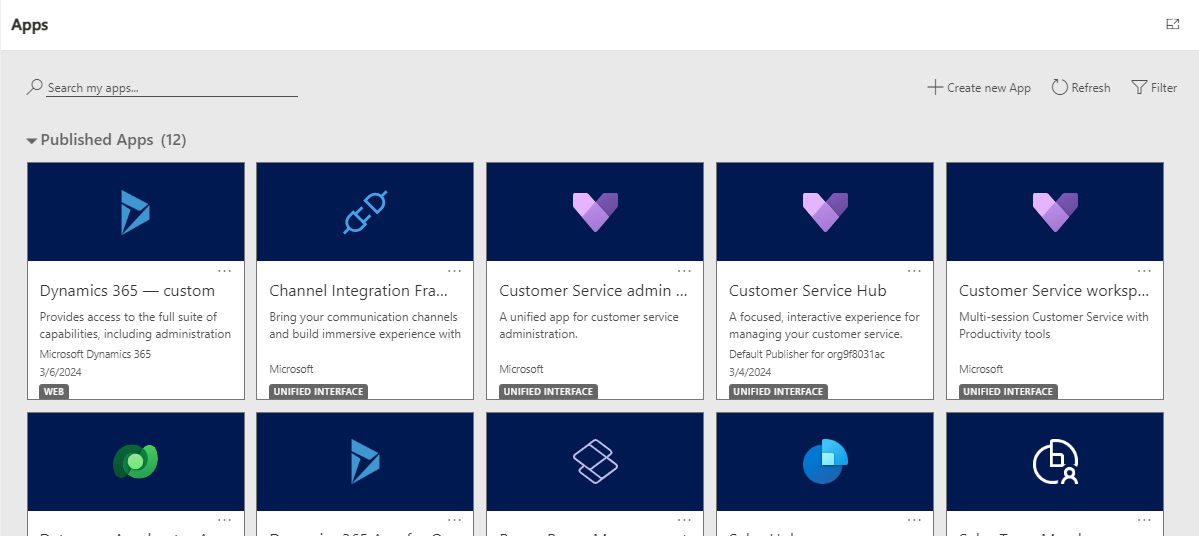
Select the Channel Integration Framework from the search bar for apps.
-
Click +New to add Oznetel as a provider.

-
On the channel provider configuration page, add the relevant details. All the fields are explained in the table below.
Field Description Name name of the channel provider. Eg: Ozonetel Label Label displayed as the title on the widget Channel URL Use this URL format to host the widget
Use: https://agent.cloudagent.ozonetel.com/home?crm=msd365&origin=YOUR_ORG_URL
(Ensure origin matches your Dynamics account URL)
Enable Outbound Communication When a phone number is selected on the Dynamics 365 Unified Interface page, the widget initiates the call or outbound communication. Channel order The order of precedence of the channel providers. API version The version of the Channel Integration Framework APIs. Trusted Domain https://agent.cloudagent.ozonetel.com Custom parameters This takes a text blob as input and Microsoft.CIFramework.getEnvironment will return this as value of key customParams. Select Unified Interface Apps for the Channel The list of Unified Interface apps where the channel is displayed for the agents. Select the Roles for the Channel The security roles that are present in Dynamics 365. -
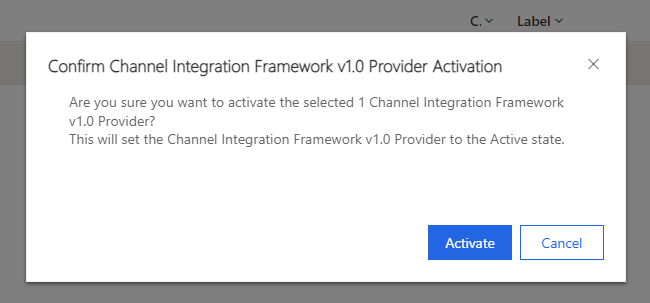
Once you have configured it, select the provider that has been added and click on Activate.

-
Confirm the activation.
-
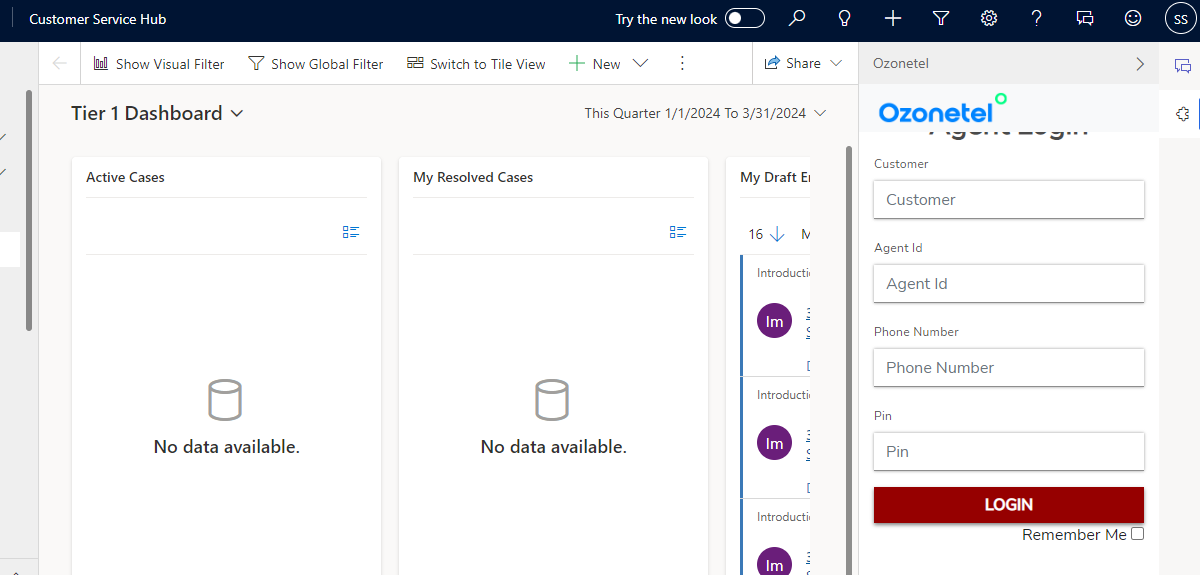
Verify the interface app that has been added to see the widget on the right side. The widget can be minimized, use the arrow to expand it for a detailed view.
Version 2.0 — Using Copilot Service Admin Center
-
To create the Channel Provider (Ozonetel), log in to your Microsoft Dynamics 365 Customer Service account.
-
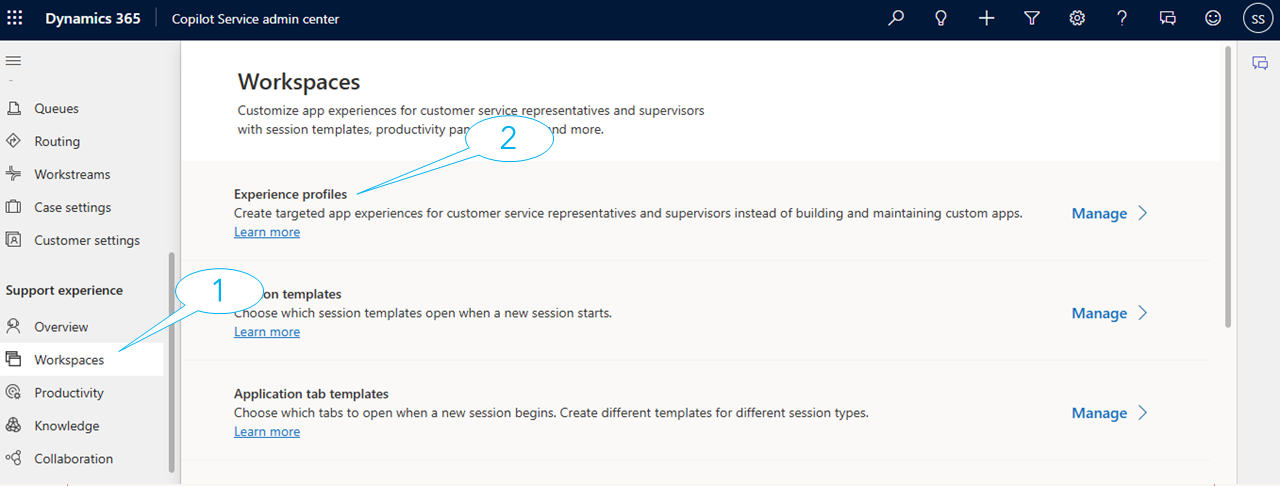
Navigate to Copilot Service Admin Center.
-
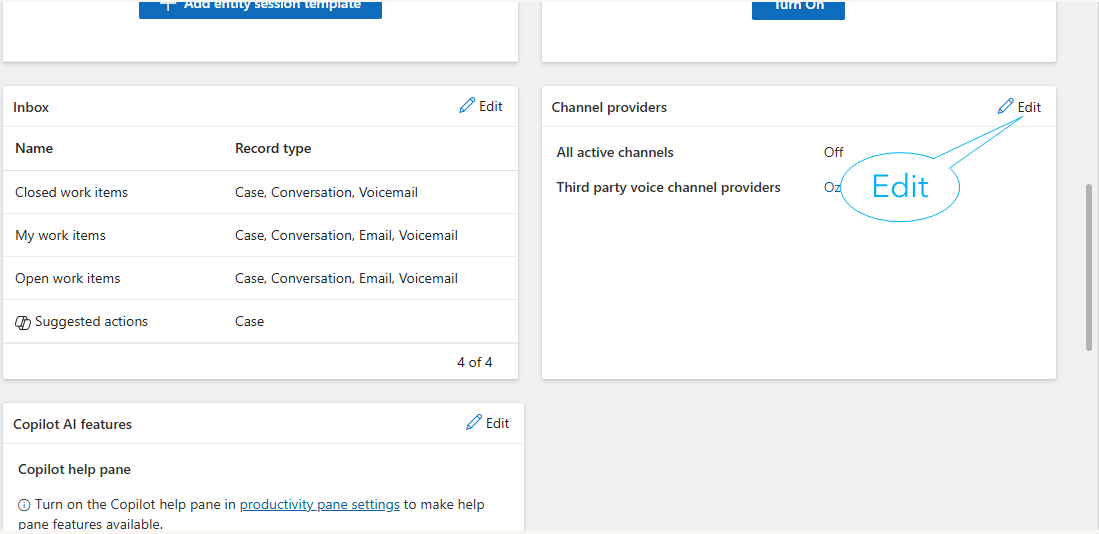
From the left menu, go to Workspaces → Third Party Voice Channel Providers.

-
Click Manage, then select New to create a new channel provider. Fill Channel Provider Details:
| Field | Description |
|---|---|
| Name | Name of the channel provider. Eg: Ozonetel |
| Unique Name | Unique Name for the entity |
| Label | Label displayed as the title on the widget |
| Channel URL | Use: https://agent.cloudagent.ozonetel.com/home?crm=msd365&origin=YOUR_ORG_URL (Ensure origin matches your Dynamics account URL) |
| Enable Out Bound | Choose to enable outbound communication |
| Channel order | The order of precedence of the channel providers. |
| API version | The version of the Channel Integration Framework. |
| Trusted Domain | Whitelist the dimaon, in this case: https://agent.cloudagent.ozonetel.com |
| Custom parameters (Optional) | This takes a text blob as input and Microsoft.CIFramework.getEnvironment will return this as value of key customParams. |
| Sandbox Configuration (Optional) | Custom sandbox properties for the widget. |
| Enable Analytics (Optional) | Select if you want to enable analytics for your channel provider. |
- Click Save & Close to complete channel creation.
- Now you need to create an Experience Profile. Navigate to Workspaces → Experience Profiles, and click Manage.
-
Click New Profile, enter details, and click Create.
-
After creation, open the profile and go to Channel Providers.
-
Click Edit, select the Ozonetel provider you created earlier, and click Save.
-
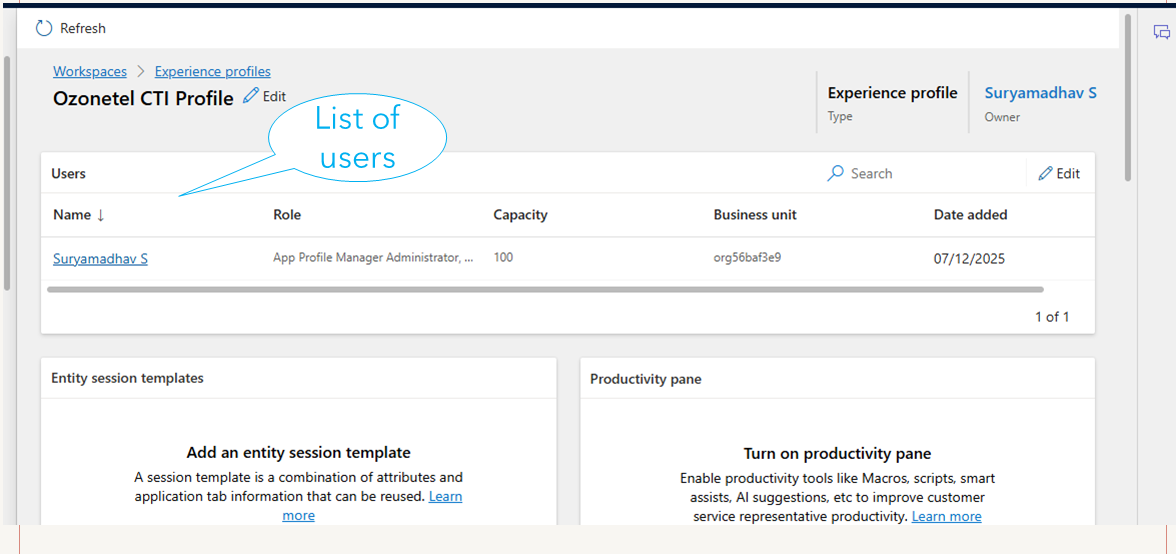
Assign Roles to Users: At the top of the Experience Profile page, review the list of assigned users.
-
Ensure each user has the following roles:
-
Omnichannel Agent
-
Customer Service Representative
These roles are required for the integration to function properly.
-
- Once integrated:
- The CloudAgent toolbar appears at the bottom-left corner of the Copilot Service workspace.
- Agents can handle inbound and outbound calls, receive screen pops, and have call activity logged automatically.
Final Outcome
After successful integration (either v1.0 or v2.0):
- Agents can handle inbound and outbound calls directly within Dynamics.
- Screen pop ensures customer data is displayed instantly.
- Call logs are automatically created and updated in Dynamics.
Updated 12 months ago