Scheduler Reports
The reports scheduler helps you get your periodic reports into your inbox directly. You can also schedule these reports for your colleagues and management. The scheduler allows you to schedule One Report at a time and with one frequency (Hourly, Daily, weekly, monthly, Current month to date).
This helps in keeping track of the workflow in the contact center at the required frequency.
Supervisors and Business heads of Inbound contact centers will find this report useful as they receive regular reports according to the frequency set.
Run Scheduler Report
Follow the instructions to schedule a report:
-
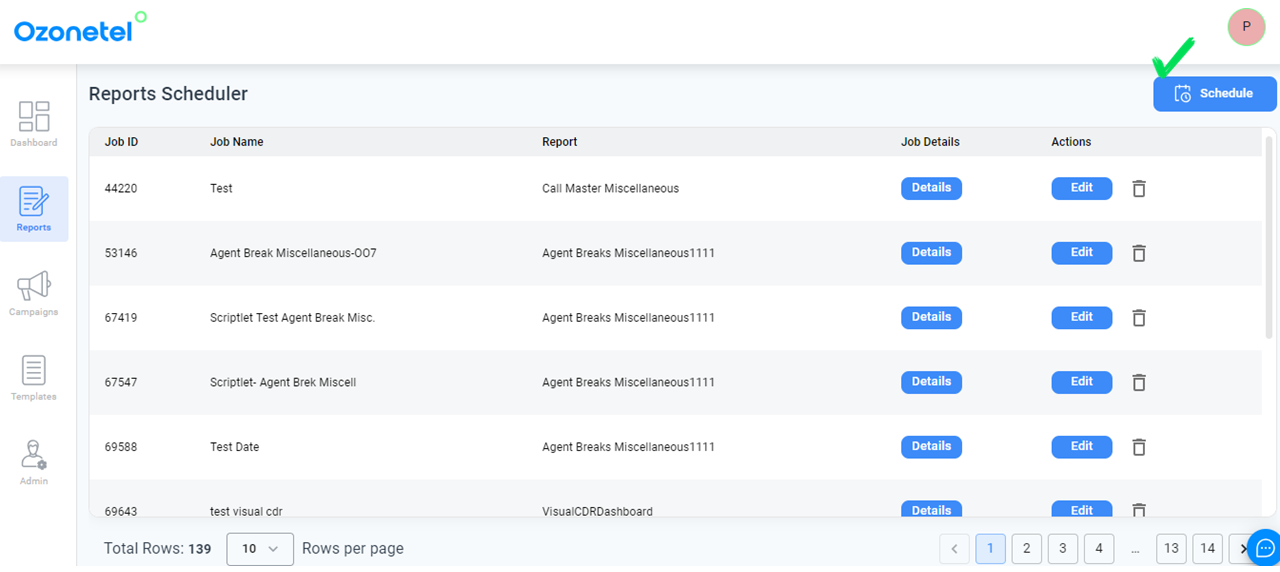
Click the Scheduler option on the top right side menu, as shown below.
-
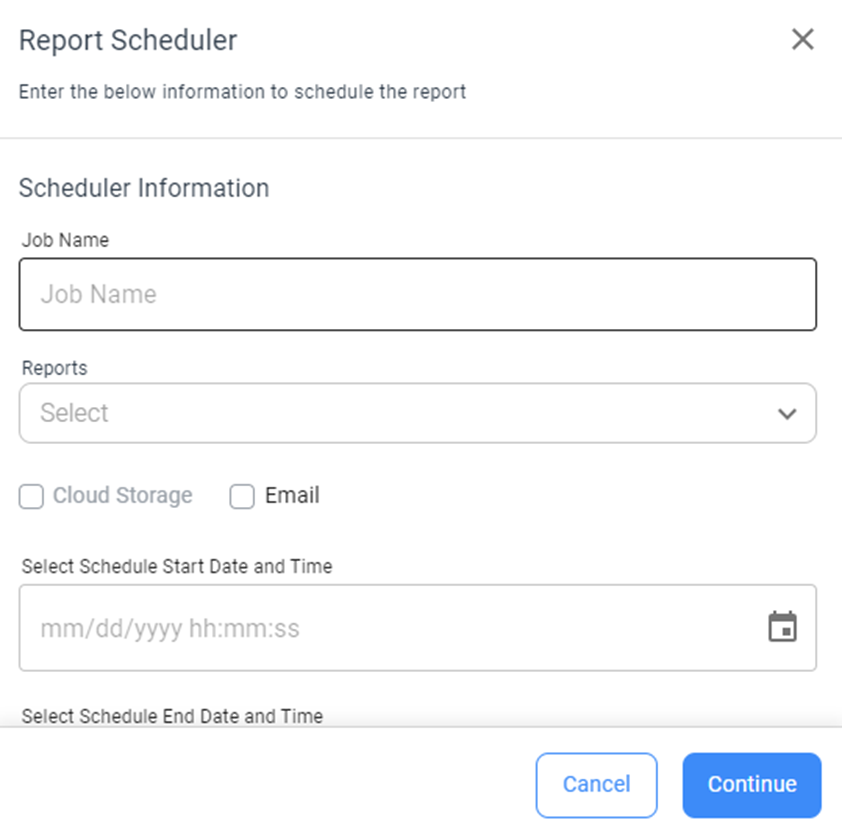
Fill in the fields in the next window. Fields descriptions are given below.
| Fields | Description |
|---|---|
| Job Name | This is an identifier for the scheduler job you are creating for sending automated email reports. You can put any name/number in this field as convenient. It is a mandatory field. |
| Email IDs | Can give multiple email IDs with comma separation. |
| Email Subject | Subject of the email sent. |
| Email Message | If any message is to be sent along the email. |
| Select Date and Time | The date and time when the email is required to be sent. |
| Reports | Select any of the reports available in the menu from the dropdown. |
| Export Type | The export types allowed are Excel, CSV & PDF files. |
| Frequency | The frequency of the scheduler can be set to
|
- Click continue then fill in the fields as per the requirement. Fields and their descriptions are given below:
| Fields | Description |
|---|---|
| From Date | Gives you the option to select the frequency in which you want the report to be generated. |
| To Date | Gives you the option to select the frequency in which you want the report to be generated. |
| Campaigns | Select the list of campaigns |
| Agents | Select the list of agents |
| CallTypes | Select the call types - Manual / Inbound / Progressive / Preview / Predictive / Mail / IVR |
- Click Confirm to have the selected report scheduled to the provided email.
Push Reports to your Cloud Storage
The CloudAgent platform now enables customers to seamlessly push reports to their own cloud storage. Here's how to set it up:
Step 1: Connect to Your Cloud Storage
You can integrate with any of the following cloud providers: AWS (via Key or ARN), Azure, or GCP. To connect:
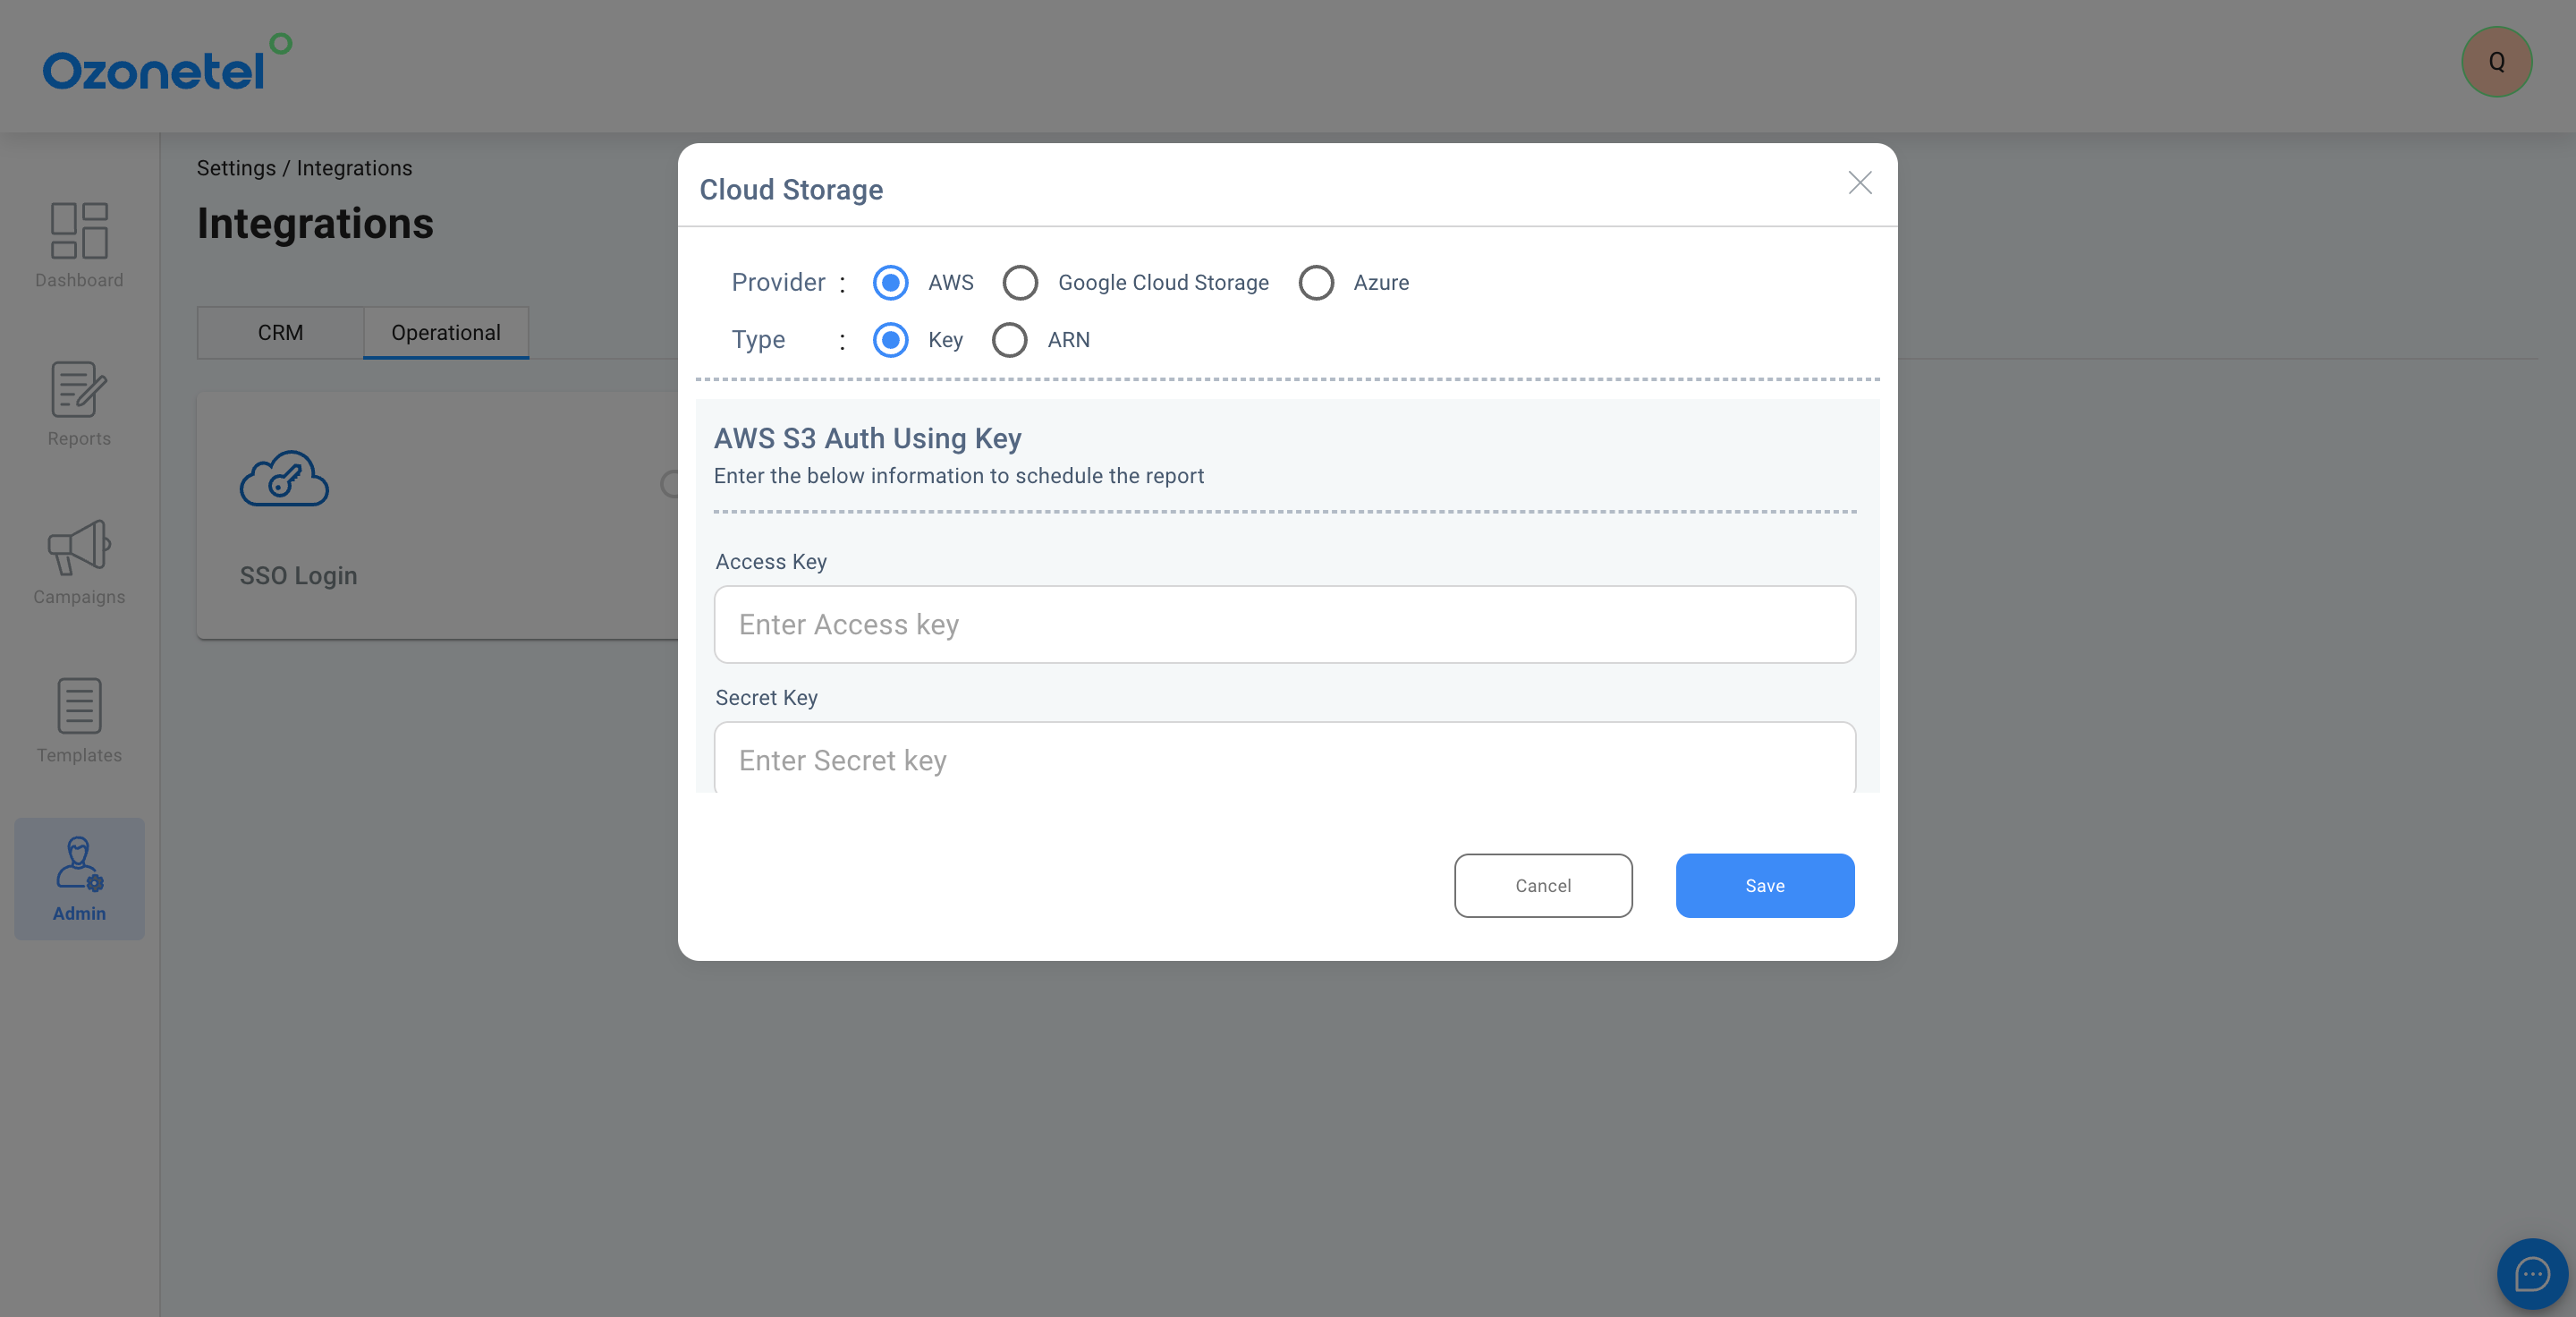
- Navigate to Admin > Settings > Integrations > Operational > Cloud Storage.
- Select your preferred cloud storage provider and enter the required details, such as access key, bucket name, and folder path, based on the provider you choose.
Step 2: Configure Report Scheduling
Once connected, you can schedule reports for automatic upload via the Reports Scheduler. To do this:
-
Navigate to the Historic Reports Page: Go to Reports -> Historic Reports -> Custom Reports.
-
Access Scheduled Reports, and click on the Schedule button on the top right.
-
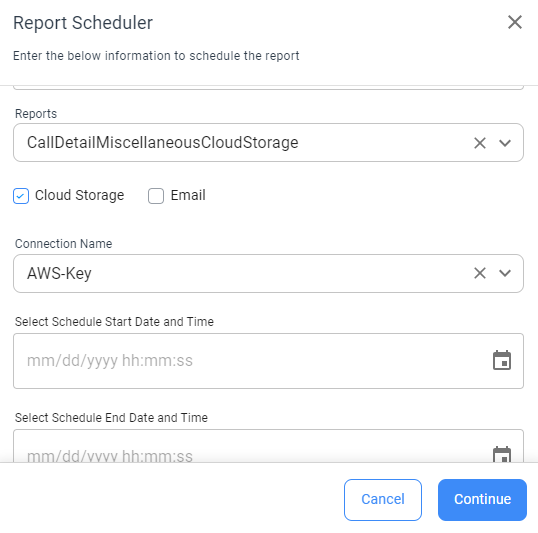
Select the report you wish to push from the available options:
- Call Detail Miscellaneous
- Agent Login Detail Miscellaneous
- Call Master Miscellaneous
- Agent Breaks Miscellaneous
- Agent State Summary
-
Check the box labeled Cloud Storage to confirm the upload destination.
-
Choose the connection name you set up in Step 1.
-
Configure Timing
- Start date : Set a future date (e.g., tomorrow) to begin pushing the reports.
- End date (Optional): Specify if you want the scheduler to stop at a certain date; leave blank for no end date.
- Frequency: Select how often reports should be pushed (e.g., daily, weekly, monthly).
-
Export Type: Select any of XL, CSV, or PDF.
-
Once the details are filled in on this pop-up, click Continue.
-
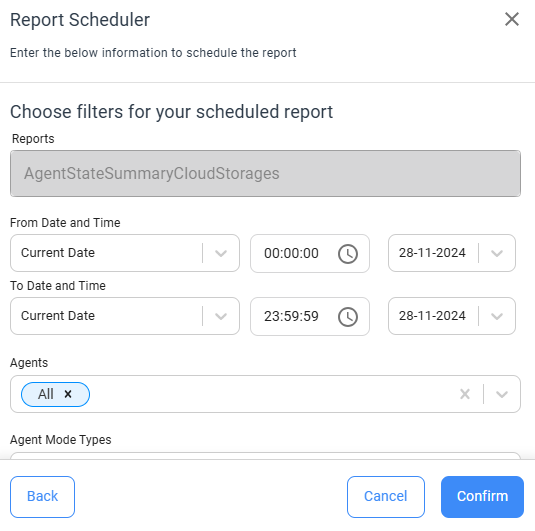
On the following page, configure filters to refine your scheduled report
-
Define Report Date Range
On this page of the report scheduler, specify the From Date and To Date carefully, as these dates define the range of data to be pushed to your cloud storage.Important Notes:If you want the daily data for a specific date range to start appearing in your storage bin from a future date (e.g., next Monday), you need to select yesterday's daterelative to the day you are configuring the scheduler.
For example:
- If you configure the scheduler on Wednesday, November 28, and want the daily previous day reports to start populating the bin from Monday, December 2, set the To Date to Tuesday, November 27.
- This ensures the scheduler starts processing data from the correct time frame and aligns with your desired start date in the storage bin.
Updated over 1 year ago