Integration with ZOHO
This support article provides a detailed guide on how to seamlessly integrate CloudAgent with Zoho CRM
Technical Prerequisites
- Zoho CRM Account
- Must have the PhoneBridge connector enabled.
- Browser Support
- Preferably Chrome and Edge.
- Permissions Required
- Zoho Admin rights to configure PhoneBridge and webhooks.
Core Features & Behaviors
| Feature | Description |
|---|---|
| Click to call | Standard PhoneBridge Click-to-Call (C2C) – Agents can initiate outbound calls using Zoho’s native PhoneBridge integration with CloudAgent. |
| Screen Pop | On inbound or outbound calls, CloudAgent sends caller number and event data to the Zoho PhoneBridge connector. • Zoho handles the screen pop logic natively by searching records based on the caller ID. • The relevant lead, contact, or deal information is automatically opened in Zoho for the agent. |
| Activity Creation/Updation | • On call initiation or reception, CloudAgent sends the relevant call event to the Zoho PhoneBridge connector. • Zoho manages the creation and updating of the activity log automatically. • The activity is associated with the customer record identified during the screen pop. |
Installation of Cloud Agent app
-
Log in to Zoho CRM as an admin.
-
Click on the profile picture on the top-right corner and select 'My Account'.
-
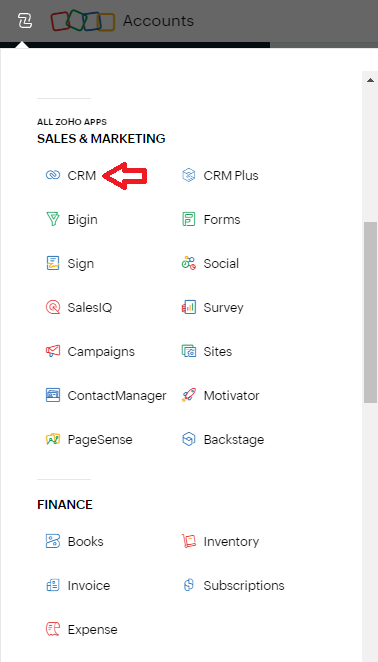
Click on the Menu icon on the left-hand top corner and select the 'CRM' option under the Sales & Marketing section.
-
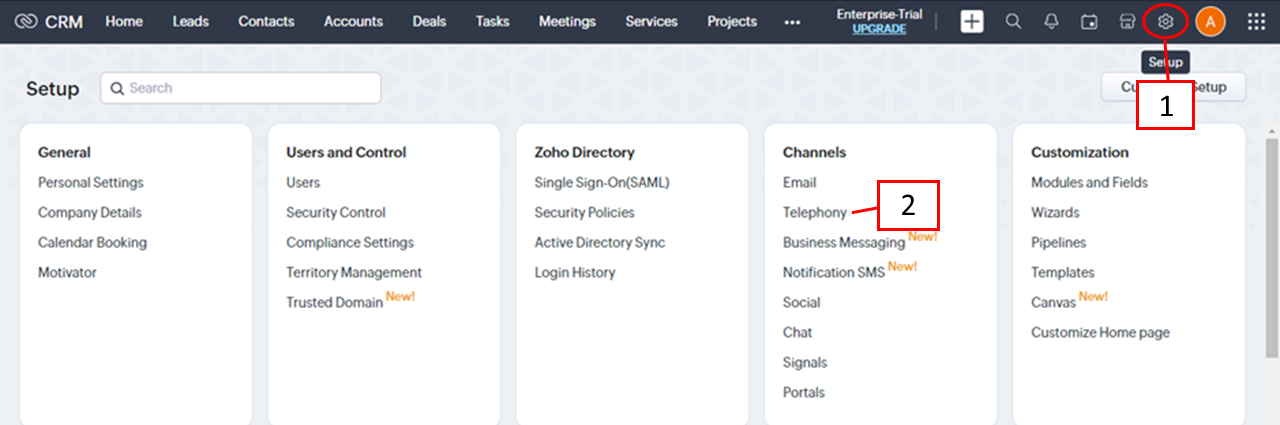
Click on the 'Settings' icon on the top right corner as shown below and select the 'Telephony' option under the 'Channels' category.
-
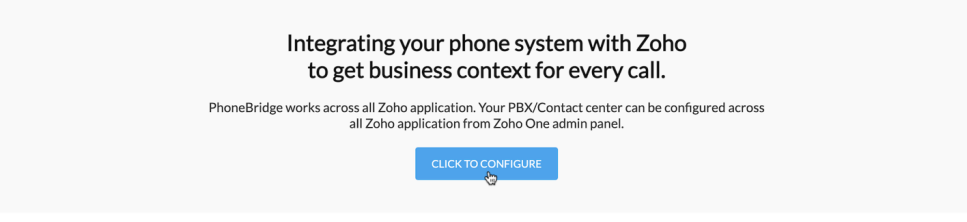
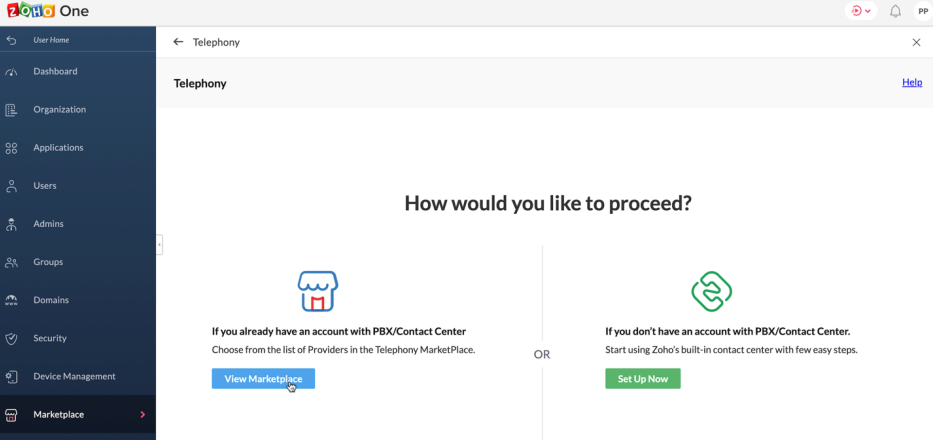
Click on Click To Configure.
-
Click on View Marketplace.
-
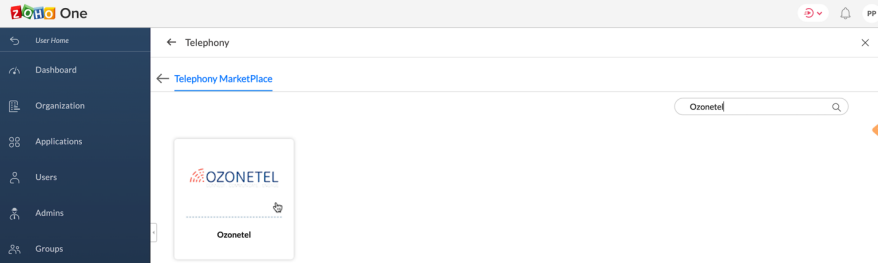
Search for 'Ozonetel' in the search box and select Ozonetel Plugin.
-
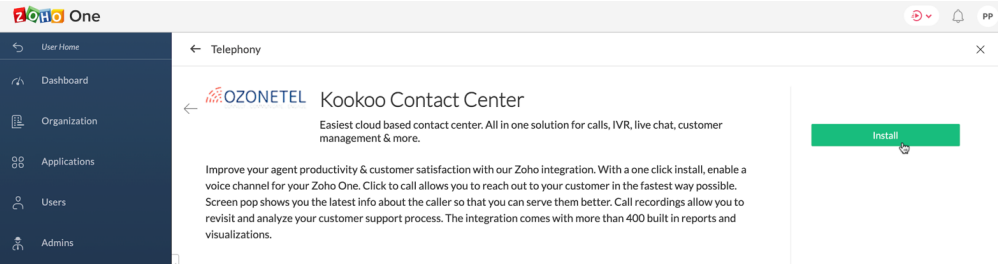
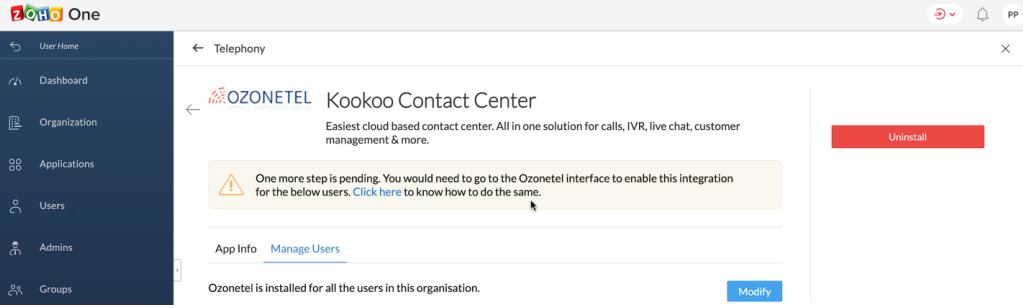
Install the 'KooKoo Contact Center' as shown in the following image.
-
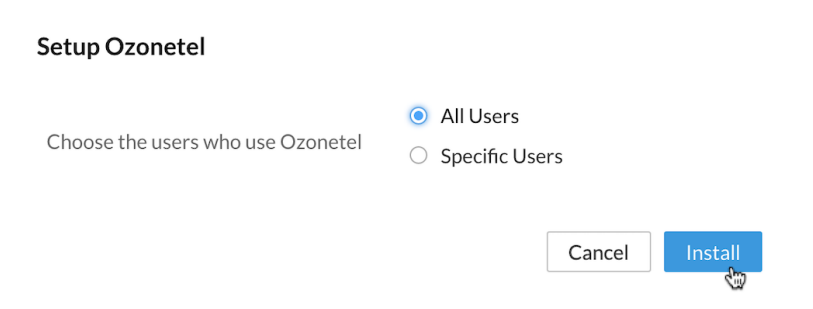
Select All Users or Specific Users based on your requirements and Click on the Install button.
-
Now the Ozonetel Plugin is Installed on Zoho One.
Integration with CloudAgent
-
Login to the CloudAgent account as an admin.
-
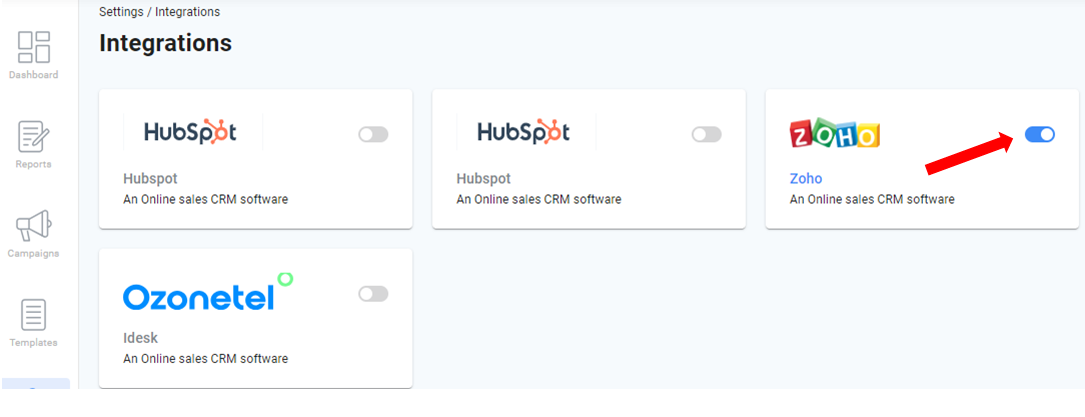
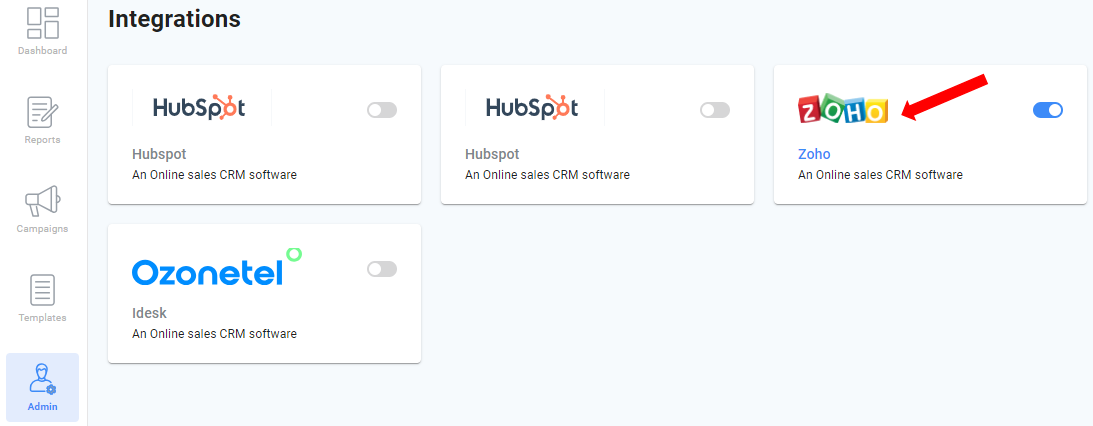
Select the Integration Option on the Admin page.

-
Toggle the button on the Zoho icon to configure the settings.
-
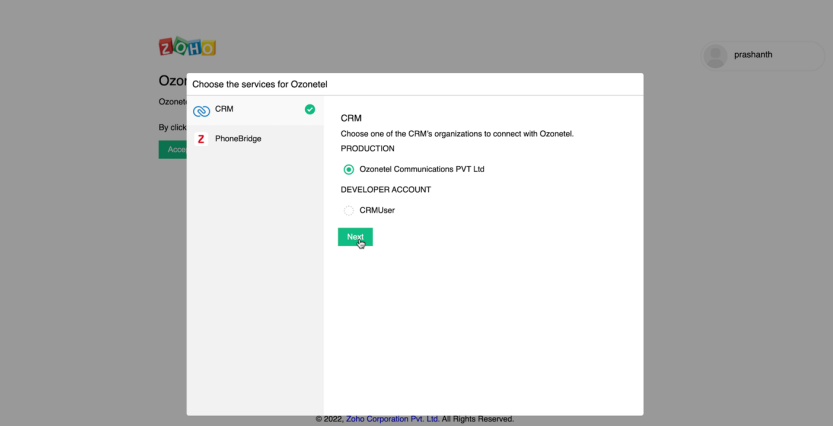
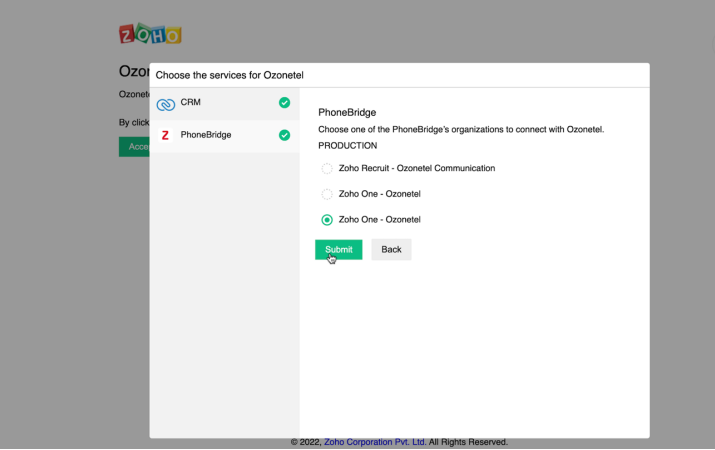
Select the CRM Organization on which the Plugin is installed.
-
Select the PhoneBridge Organization on which the Plugin is installed.
-
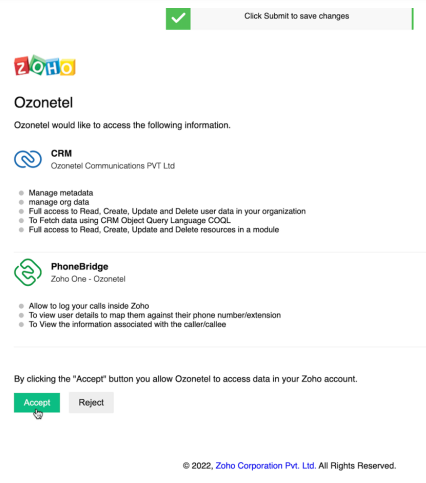
Click on the Accept button.
-
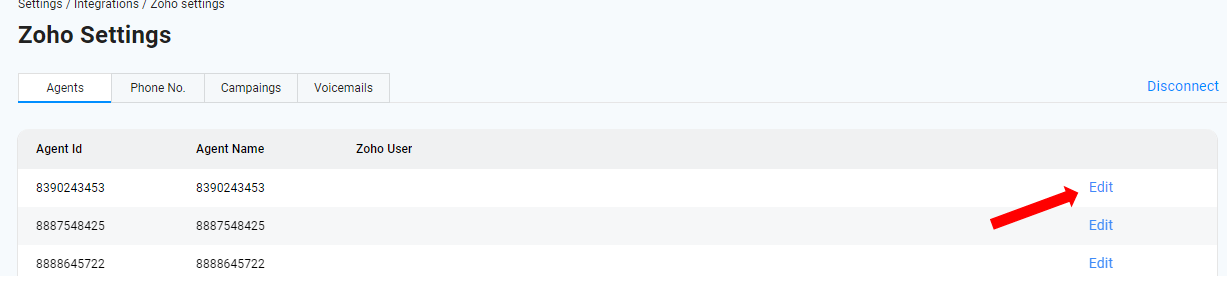
Integration with Zoho One CRM is now complete. Access the settings by clicking on the icon displayed when hovering over the Zoho button.
-
Click on the Edit Button to assign the ZOHO CRM username against an Agent and save it.
-
Click on the Campaign menu and select either an Inbound or Outbound campaign as per your requirement.
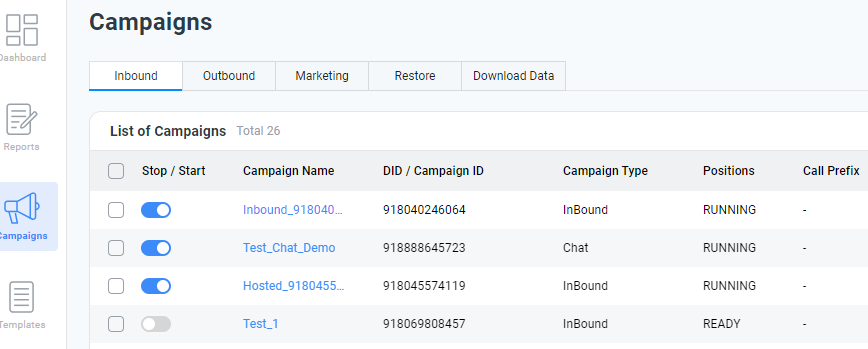
-
Double-click on the campaign name that will be used with Zoho CRM integration to edit the campaign.
-
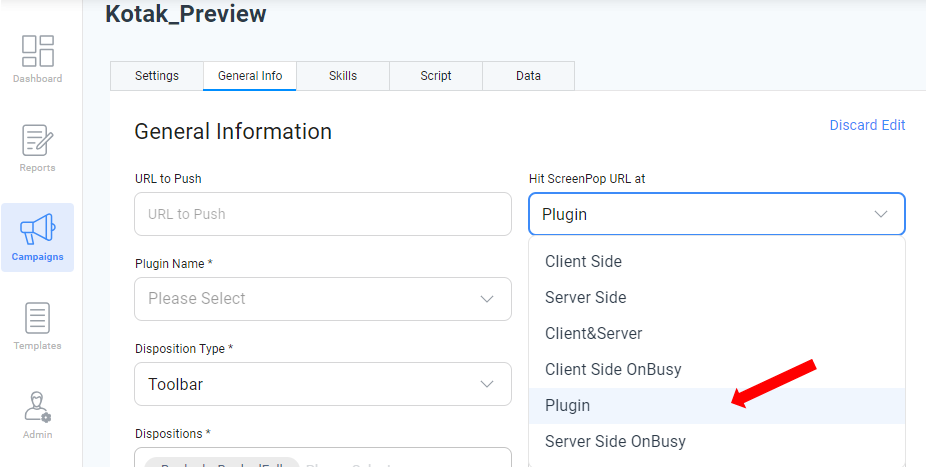
From the drop-down menu, choose the Plugin option for the "Hit Screen popup at" field.
-
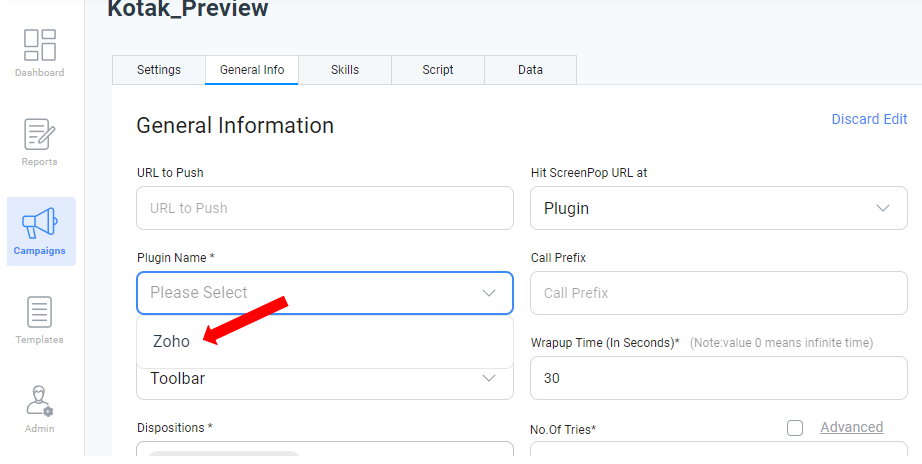
In the "Plugin Name" field, choose the ZOHO option and save the campaign.
-
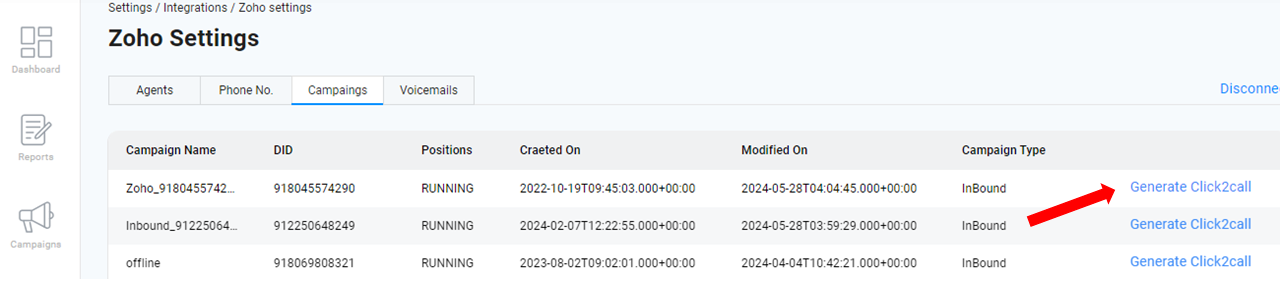
Now, go back to the Zoho settings page, and click on the campaign menu.
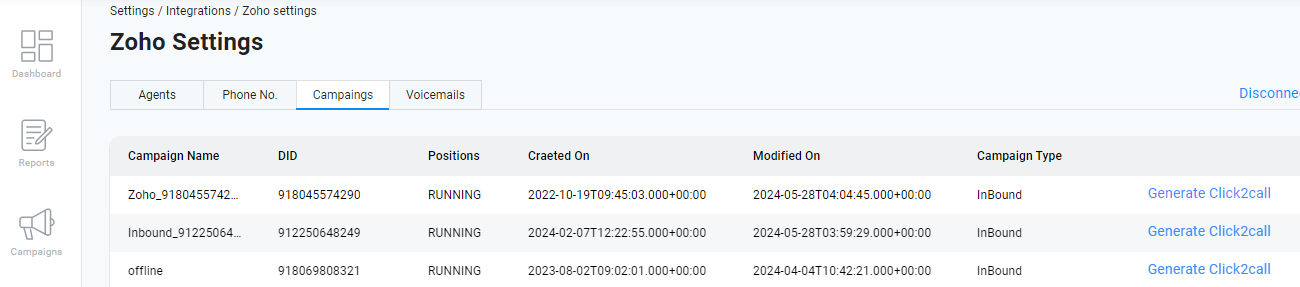
-
Click on Generate Click2Call against the campaign on which the Zoho CRM plugin is selected.
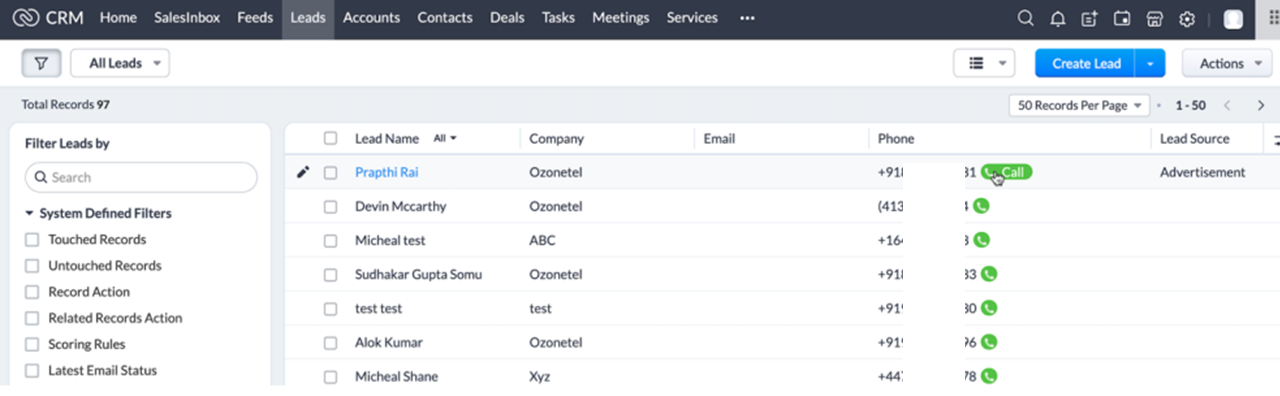
-
Navigate to the Zoho CRM login page associated with the mapped Zoho user and refresh the page. If you observe a green-colored call button next to the phone number, the integration is successful.
-
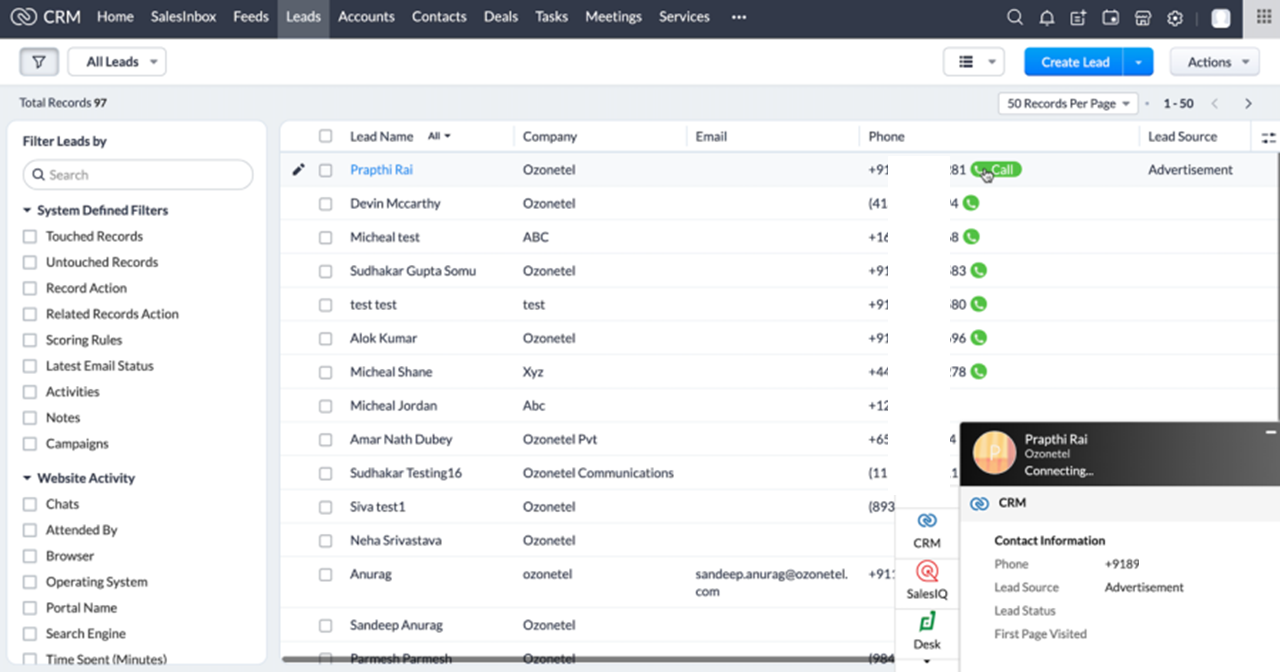
Clicking on the Call Button will initiate a manual Click2Call and a Business Card pop-up will be shown on the Zoho CRM and the call will land at the Agent login on Cloud Agent if the agent is on Manual or Blended mode.
Updated about 1 year ago