Integration with HubSpot
This support article provides a detailed guide on how to seamlessly integrate CloudAgent with HubSpot
Pre-Requisites
- Customers must have a HubSpot account to log in and configure the integration.
Installation of Cloud Agent App
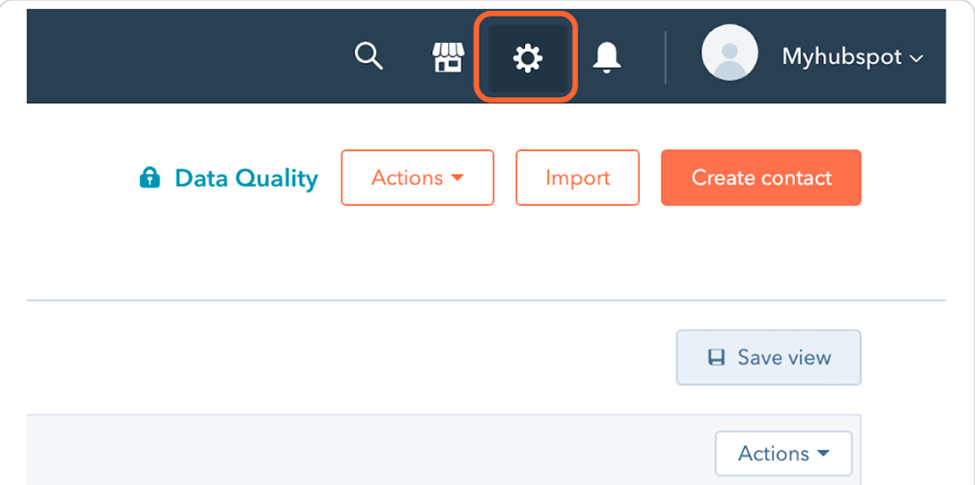
- Login to HubSpot as an Admin.
- Click on the Settings option as shown below.
-
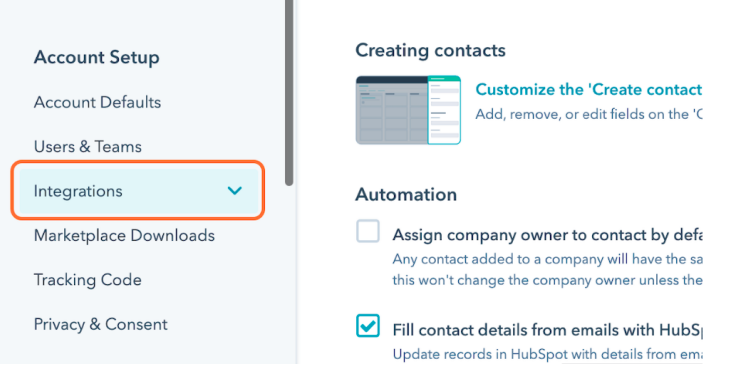
Click on the Integrations drop-down.
-
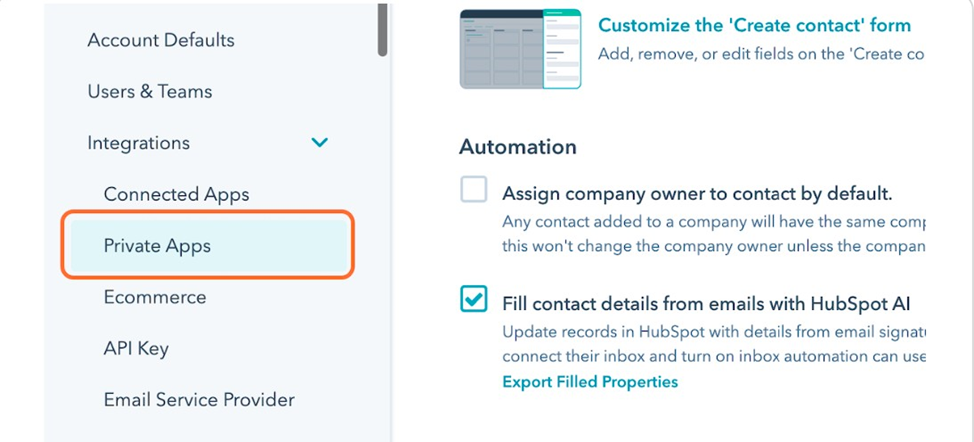
Click on Private Apps under the Integrations drop-down menu as shown below.
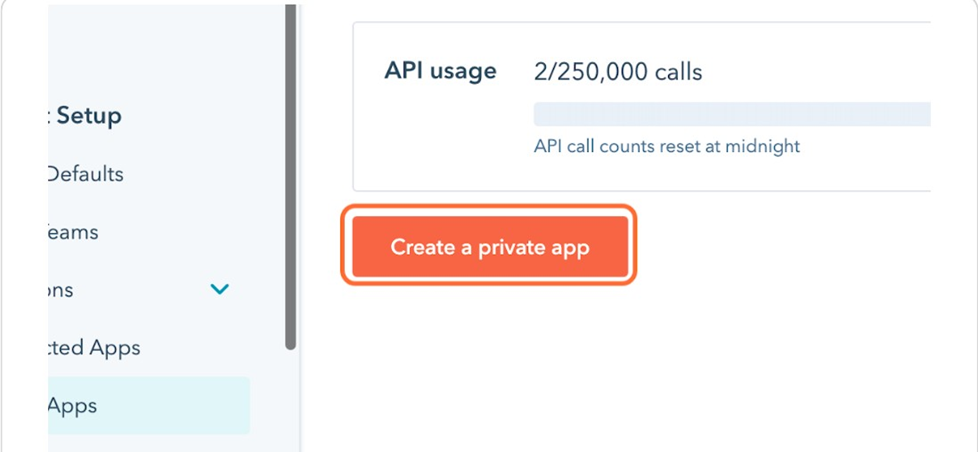
- Click on the Create a private app button.
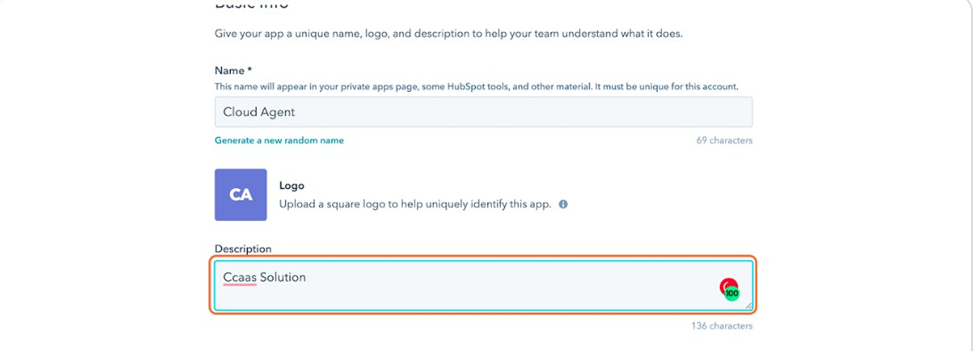
- Give any desired name (ex: Cloud Agent) and description (ex: Ccaas Solution) for the Private app as shown below.
- Click on the Scopes tab as shown below.

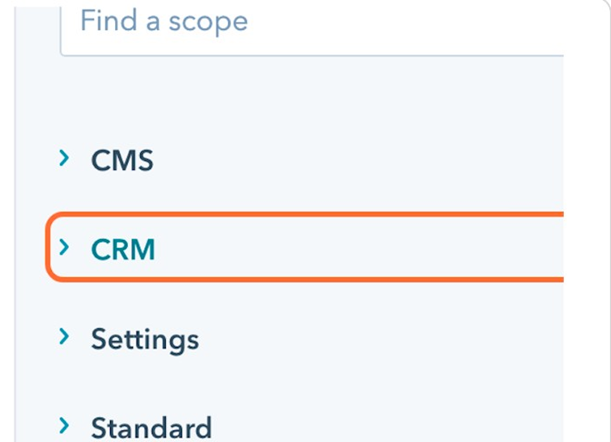
- Click on the CRM drop-down menu as shown below.
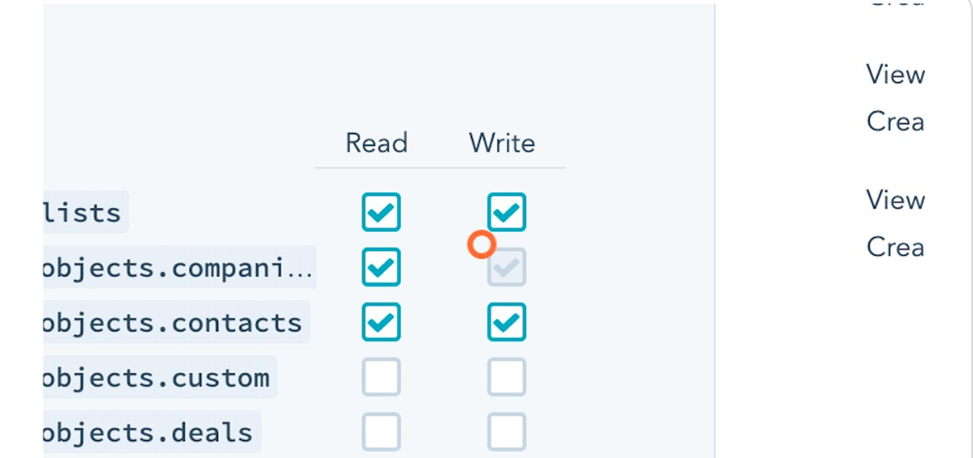
- Provide Read and Write access to the CRM objects.
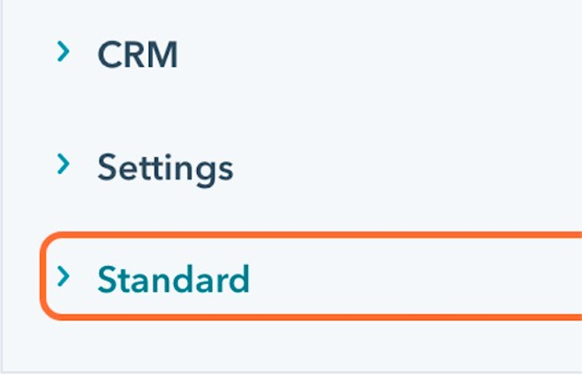
- After granting access, choose the Standard option from the menu.
-
Check the Checkbox against the oauth option.

-
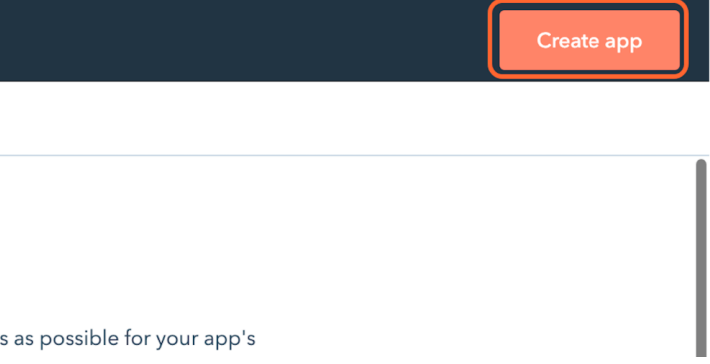
Click on the Create App button to create the Private App.
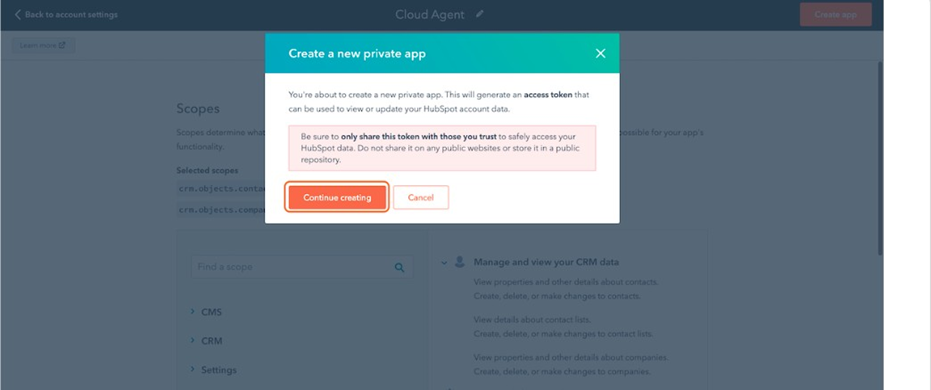
- On the Continue Creating button.
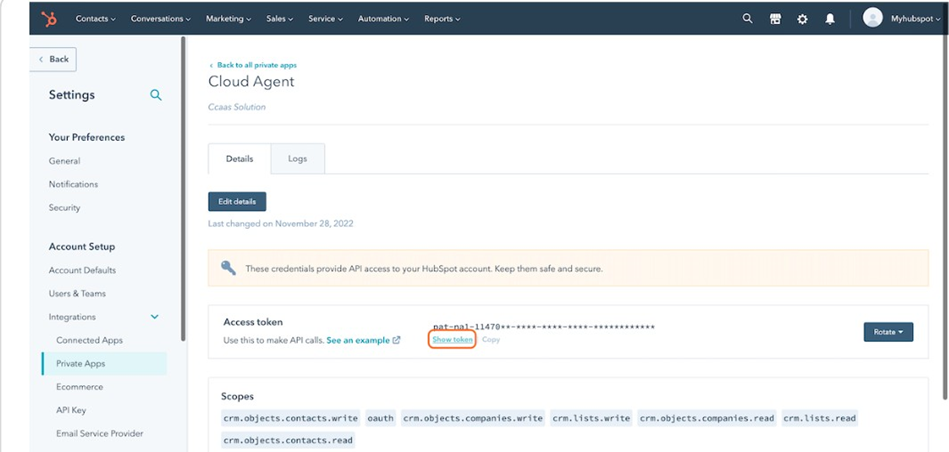
- Navigate to the settings menu and access Private Apps. Choose the newly created Cloud Agent. Within this page, select the "Show token" option and copy the access token.
- Add the Access token into both the Screen pop-up URL and the Callback URL against hapikey
parameter.
Screen pop-up URL
https://ccaas.ozonetel.com/CAServices/hubspotScreenpop.php?hapikey=add access token &hubId=8063832&phoneNumber=
Callback URL
https://ccaas.ozonetel.com/CAServices/hubspotLogActivity_allegiant.php?ha
pikey=add access token&hubId=8063832
Updated about 1 year ago